BULK PRICING DEALS

15% OFF

15% OFF THE LOWEST LISTED PRICE
Ir al contenido
The Ultimate Guide to Cleaning Windows, Blinds, and Curtains Like a Pro

The Ultimate Guide to Cleaning Windows, Blinds, and Curtains Like a Pro

It's easy to neglect your windows, blinds, and curtains, but it’s an essential part of maintaining a clean and inviting home. Dust, dirt, and allergens can accumulate in these areas over time, affecting not only the appearance of your home but also the indoor air quality.

Tackling these surfaces with the right methods ensures that your home stays fresh, and the natural light can flow through crystal-clear windows, making your space feel brighter and more open.

We’ll go over the best ways to deep clean these areas, using the most effective tools and methods for a truly polished finish. Let’s dive in!

Gather Your Materials

Before you begin, it’s important to have all your tools and cleaning supplies ready. This will save time and ensure you achieve the best results. Here’s what you’ll need:

How to Clean Window Tracks

Window tracks are one of the most overlooked parts of window cleaning, yet they tend to collect dust, dirt, dead bugs, and grime over time. Keeping your window tracks clean not only improves the overall appearance of your windows but also ensures that they open and close smoothly.

Clean the window track first and the glass later. Here’s how to deep clean window tracks like a pro.

Step 1: Vacuum the Track

Start by using your vacuum’s crevice tool to remove loose debris, dust, and dirt from the window tracks. This step is crucial as it helps eliminate larger particles that may obstruct your cleaning process later on.

Focus on the corners and tight spaces where dust and debris tend to accumulate the most. By vacuuming first, you prevent the dirt from getting pushed around when you start scrubbing.

Step 2: Scrub the Tracks

After vacuuming, it’s time to scrub away any remaining dirt and grime. Spray the all-purpose cleaner liberally in the track. Using your crevice brush, scrub the tracks thoroughly, paying close attention to the edges and corners.

The brush will help loosen any stuck-on dirt or residue. For tough, hard-to-reach spots, you can wrap a damp microfiber cloth around the brush to target those areas more effectively.

Step 3: Wipe Clean and Dry

Once the tracks are scrubbed clean, use a damp microfiber cloth to wipe away any remaining soap and dirt. Be sure to remove all residue to avoid leaving behind streaks or buildup. After wiping, use a dry microfiber cloth to ensure the tracks are completely dry.

Drying the window tracks is crucial to prevent moisture from settling, which can lead to mold, mildew, or rust in metal tracks.

How to Clean Windows: Glass and Sills

Windows are a key feature in every room, allowing natural light to brighten up your space. However, they tend to accumulate dust, grime, and streaks, especially after rain or exposure to pollutants.

Cleaning windows and their sills thoroughly ensures a sparkling, streak-free finish that makes a huge difference in the overall appearance of your home. Here’s a step-by-step guide to achieving professional-level window cleanliness.

Clean the Window Sills and Frame

Window sills and frames can harbor dirt and grime. Dirty sills can also make a window look terrible even if the glass is clean.

Vacuum the Sills and Frame

Use a vacuum with a crevice tool to suck up loose dust, dirt, and cobwebs from the sills and frame. Pay attention to the edges and corners where debris tends to collect.

Wipe Down the Sills and Frame

Dampen a microfiber cloth with all-purpose cleaner and wipe down the window sills and frames. This will remove any remaining dust or dirt that the vacuum didn’t pick up. For stubborn spots, a soft-bristled brush or toothbrush works wonders in cleaning crevices and hard-to-reach areas.

If you can't reach the top edge of the window sill, use a microfiber high-reach duster dampened with some all-purpose cleaner.

Dry the Area

Once the sills and frame are clean, use a dry microfiber cloth to thoroughly dry the surfaces. This helps prevent water spots and keeps mold or mildew from forming in damp areas.

Clean the Window Glass

Now that you’ve cleaned the tracks and sills, it’s time to tackle the window glass. Follow these steps for a streak-free shine:

Spray the Cleaner

Spray your glass cleaning solution it directly onto the glass. Be generous, especially in areas with visible smudges or grime.

Wipe with a Microfiber Cloth

Using a microfiber cloth, wipe the glass in a circular motion. This technique helps lift and eliminate streaks. For very dirty windows, you may need to repeat this step or use a second clean cloth for a final wipe.

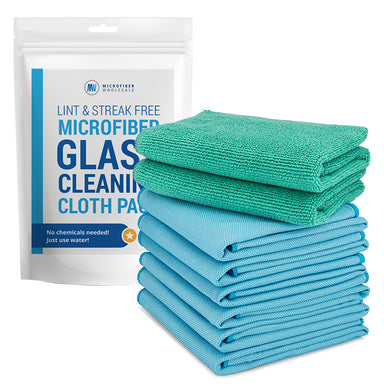
Use a Lint-Free Glass Cloth

For a flawless, streak-free result, use a lint-free glass cloth. This cloth works best on glass that is still visibly wet, so if the surface is dry, get a damp microfiber cloth and working in sections, wipe over the area with the damp cloth.

Follow with the glass cloth, polishing and buffing the surface revealing a spotess, like-new finish.

Glass & Mirror Genie Sheets

Our latest innovation in cleaning comes in the form of detergent sheets. Just add water and you have a professional-strength, plant-based cleaning solution for spotless glass and mirrors.

How to Clean Blinds

Blinds are a popular window treatment that can easily accumulate dust and dirt. With regular maintenance, you can keep them looking pristine, and periodic deep cleaning will ensure they remain in excellent condition. Here’s a guide to cleaning different types of blinds, from delicate wood to durable vinyl and aluminum.

Cleaning Wood Blinds

Wood blinds add a classic, elegant touch to your home, but they require special care due to their delicate nature. Water can warp and damage wood, so it’s essential to clean them without moisture.

Dust Regularly

Wooden blinds should be dusted frequently to prevent buildup. Use a microfiber duster or dry microfiber cloth to gently wipe each slat, making sure to reach between them. A vacuum with a soft brush attachment can also be used on a low setting for efficient dust removal.

Deep Clean Annually

For a deeper clean, treat your wood blinds once a year with a wood-safe polish. Apply the polish to a soft cloth and carefully wipe down each slat, enhancing their shine and preserving the wood’s finish. Be sure to avoid using water or any liquid cleaners that could cause damage.

Cleaning Faux Wood Blinds

Faux wood blinds offer the aesthetic appeal of real wood but with added durability. They are more resistant to moisture, which allows for easier, more thorough cleaning.

Dust Regularly

Like real wood, faux wood blinds should be dusted regularly with a microfiber duster or a vacuum with an upholstery attachment. This prevents dust from settling into crevices and becoming harder to remove over time.

Deep Clean with Water

Unlike wood blinds, faux wood blinds can handle a bit of moisture, so they can be wiped down more thoroughly. Spray the blinds with all-purpose cleaner and wipe down with a microfiber cloth.

After cleaning, dry each slat with a clean towel to prevent water spots. For blinds located in areas like kitchens or bathrooms, where grease or humidity might be an issue, this method ensures a deeper clean without risking damage.

Cleaning Vinyl and Aluminum Blinds

Vinyl and aluminum blinds are durable, cost-effective, and often found in both homes and offices. These blinds are designed to withstand more intensive cleaning, making them easy to maintain.

Dust Regularly

Use a microfiber duster or a vacuum with an appropriate attachment to dust the slats. Regular dusting prevents dirt from building up, which can cause the blinds to look dull and grimy over time.

Deep Clean by Soaking

For a deeper clean, vinyl and aluminum blinds can be removed from the window entirely. Fill a bathtub with warm, soapy water and submerge the blinds to soak for 15-30 minutes.

After soaking, use a soft sponge to scrub away any remaining dirt or stains. Rinse the blinds with clean water, and allow them to air dry fully before rehanging.

This method is especially useful for blinds in high-traffic or moisture-prone areas, as it thoroughly removes grime and buildup.

How to Clean Curtains

Curtains come in a wide range of fabrics, each requiring a unique cleaning approach. Whether you have delicate sheers, durable cotton, or luxurious silk curtains, it's essential to follow the correct methods to preserve their appearance and longevity. Always start by checking the care label for specific instructions before diving into any cleaning routine. Here’s a breakdown of how to properly clean different types of curtains.

Cleaning Sheer Curtains

Sheer curtains are made from lightweight, delicate fabrics that allow light to filter through while adding an elegant touch to your windows. However, they can easily accumulate dust and dirt, requiring careful handling to prevent damage.

Vacuum Regularly

To keep sheer curtains dust-free, use a vacuum with an upholstery attachment. Gently run the vacuum over the curtains, starting at the top and working your way down. This helps remove surface dust without damaging the delicate fabric.

Hand Wash with Care

For a more thorough cleaning, fill a basin with cold water and a mild detergent. Submerge the curtains and let them soak for about 10 minutes to loosen any embedded dirt. Gently swirl them around but avoid scrubbing, as this can tear or warp the fabric.

Rinse and Hang to Dry

Rinse the sheer curtains thoroughly with cold water to remove all soap residue. Hang them to dry naturally, ensuring they are not in direct sunlight to prevent discoloration. For added crispness, you can dissolve a small amount of Epsom salt in the final rinse, which will help restore the fabric's structure.

Cleaning Cotton & Polyester Blend Curtains

Cotton and polyester blend curtains are more durable than sheers and are often machine washable, making them easier to maintain. However, they still require proper care to avoid shrinkage or damage.

Vacuum First

As with sheer curtains, start by vacuuming your curtains to remove surface dust. This helps prevent dust from becoming embedded during the wash.

Machine Wash on Delicate

Remove any hardware, such as rings, clips, or hooks, to avoid damaging the fabric or your washing machine. Place the curtains in the washer on a delicate cycle using cold water and a mild detergent. Be sure to follow the care label for specific washing instructions.

Dry and Iron

Fo cotton, after the wash cycle, remove the curtains promptly and iron them while slightly damp to prevent wrinkles. This will also help them maintain their shape as they dry.

For polyester blend curtains, after the wash cycle, simply shake them out. Reattach the hardware and hang them back up for a freshly cleaned, wrinkle-free look.

Cleaning Silk Curtains

Silk curtains are the epitome of luxury, but they are also the most delicate and require extra care to keep them looking their best.

Vacuum Only

For everyday maintenance, use a vacuum with an upholstery attachment to gently remove dust from silk curtains. Avoid using water, as even small amounts can leave watermarks or damage the silk’s delicate fibers.

Professional Cleaning for Deep Care

When your silk curtains need a more thorough cleaning, it’s best to take them to a professional cleaner who specializes in silk. Trying to clean them yourself with water or detergents could result in irreversible damage to the fabric. Always inform the cleaner of any special requirements based on the curtain’s care label.

How Often Should You Clean Windows, Blinds, and Curtains?

Ventanas

As a general rule, you should clean your windows, including the glass, tracks, and frames, at least twice a year to keep them looking clear and grime-free. However, if you live in a particularly dusty environment, or in coastal areas where salt buildup can occur, you may need to clean them more frequently—every three to four months is ideal for these conditions.

Regular cleaning prevents the accumulation of dirt and debris, which can lead to tougher stains and even damage over time.

Blinds

Blinds tend to attract dust quickly, so it's important to dust them at least once a month. This regular maintenance helps avoid the buildup of dust and allergens, especially in households with pets or people prone to allergies.

For a deeper clean, which involves removing and washing or wiping down each slat, aim to do this once a year. If you have faux wood or vinyl blinds, which can tolerate water, you might want to clean them more frequently, particularly in high-humidity or kitchen areas where grease can accumulate.

Curtains

The cleaning frequency of your curtains largely depends on the material. Sturdier fabrics, like cotton or polyester, can usually go 6 to 12 months between cleanings, while more delicate fabrics, such as silk or sheer curtains, may require more frequent attention. For high-traffic areas or homes with pets, consider washing or professionally cleaning your curtains every 6 months to prevent dirt from embedding into the fabric.

Always follow the care label instructions to ensure the longevity of your window treatments.

Additional Tips for Cleaning Windows, Blinds, and Curtains

Start from the Top

When cleaning windows and their treatments, always work from the top down. This strategy is crucial for ensuring that any dust or dirt dislodged from higher surfaces doesn’t fall onto areas you've already cleaned.

Start by dusting the blinds or curtains, followed by cleaning the window frame and sills. Finish with the glass for a streak-free shine. By adhering to this method, you’ll avoid recontaminating your freshly cleaned areas, saving time and ensuring a professional-grade result.

Use Microfiber for Superior Results

Microfiber cloths and dusters are the gold standard when it comes to cleaning. Unlike traditional cotton or paper towels, microfiber is designed to trap dust, dirt, and grime within its fibers, rather than simply moving it around.

This makes microfiber ideal for cleaning delicate surfaces like window glass, blinds, and frames, as it won’t scratch or leave behind lint. For a truly polished finish, use dry microfiber for dusting and damp microfiber for wiping down surfaces. You'll be amazed at how much dirt these cloths can capture!

Check Care Labels Before Cleaning

Before you dive into cleaning your window treatments, always take a moment to check the care labels, especially for fabrics like silk, velvet, or sheer curtains. These materials can be sensitive to water, soap, or aggressive cleaning techniques, and following the manufacturer’s care instructions is key to maintaining their appearance and longevity.

For example, while cotton curtains may be machine washable, silk curtains often require professional cleaning. By respecting the care label, you’ll avoid damaging the material and ensure that your window treatments stay looking their best for years to come.

Regular Cleaning Makes For a Healthier Home

Properly cleaning your windows, blinds, and curtains doesn’t have to be a chore. With the right tools and techniques, you can keep these surfaces looking their best all year round. By following this guide, you’ll master how to clean windows, how to clean blinds, how to clean window tracks, and how to clean curtains like a professional.

Regular maintenance not only enhances the appearance of your home but also contributes to a healthier living environment. So roll up your sleeves, grab your microfiber cloths, and let the light shine through spotless, sparkling windows!

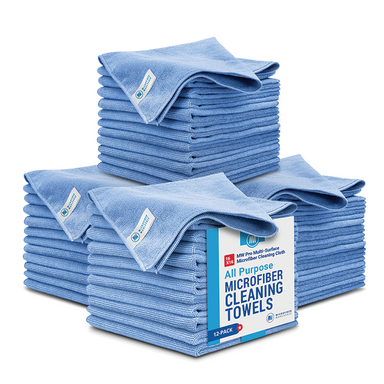
Our best selling towels in 48 packs

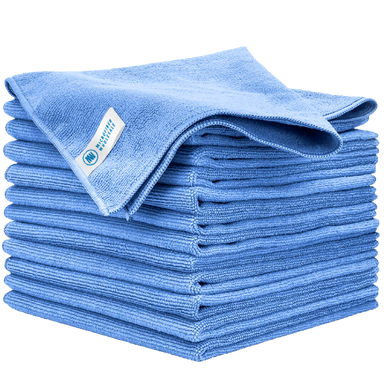
Our MW Pro Multi Surface Microfiber Towels are the holy grail of cleaning tools. Professionals don't clean without them, and they're a must-have in every cleaning arsenal. Buy bulk and save big!

The 12"x12" is the perfect compact size for tackling smaller surfaces and items, like ornaments and bookshelves.

The 16"x16" allow you to clean larger areas like countertops and windows quickly without needing to replace towels frequently.

Preguntas frecuentes

Encuentre respuestas a nuestras preguntas más frecuentes.

Vídeos sobre cómo hacerlo

Vea cómo utilizar su microfibra de forma eficiente y eficaz.

Artículos

Artículos y consejos técnicos sobre el mejor uso y cuidado de su microfibra.

Entrevistas

Aprenda las mejores técnicas de limpieza de microfibras de la mano de profesionales expertos.

Continue To Cart Continue To Customize

By continuing with your order, you acknowledge and agree to the following:

Our property-marked towels are printed with a repeating pattern, and logo placement may vary from towel to towel.

You’ve chosen between receiving an emailed digital proof for a detailed review of your design at an additional cost of $20, or allowing our print team to use your uploaded file to prepare your order for printing.

We do not accept returns for printed property marked towels.