Ir al contenido

DUST OFF SAVINGS

20% OFF MICROFIBER DUSTERS

Not valid on previously negotiated prices!

How Pros Clean Homes Efficiently: A Checklist for Cleaners and Homeowners

How Pros Clean Homes Efficiently: A Checklist for Cleaners and Homeowners

If you're a professional cleaner, you likely have a house cleaning routine. But perhaps you're wondering if there’s a more efficient way, or interested in how other professionals do it.

For those of you not in the cleaning business, you may be curious about the techniques pros use to efficiently clean homes day after day.

In honor of National Cleaning Week, here is a step-by-step checklist of the various techniques and methods pros use to clean homes quickly and effectively.

Let's dive in!

A Word on National Cleaning Week

According to the International Sanitary Supply Association:

“National Cleaning Week represents a unique opportunity to celebrate the value of clean, honor fellow cleaning industry professionals, and raise public awareness to the industry's commitment to maintaining healthy environments for workers and customers.”

We'd like to express our gratitude to all the cleaning professionals out there who work tirelessly to keep us all healthy and safe. Thank you for your hard work.

The General Order of Things

When cleaning a home, most seasoned professionals have a method that helps them work quickly, while still getting the best results. These systems can vary depending on personal preference.

But, after asking several professionals and doing a little digging, I discovered that there are several things that hold true for most, which are:

      1. Decluttering first.
      2. Starting from the back of the house.
      3. Working left to right, top to bottom.
      4. Using high quality supplies.

1. Decluttering First

For cleaning professionals, whether you offer decluttering in your services or expect it from your customers, this step is critical to get the job done quickly and properly.

Remove all items that are not attached to the countertops and floor, unless they are too heavy or can’t be put elsewhere. For all those shampoo bottles in the shower, hair ties and books on the bedside table, and small appliances on the kitchen countertop — they need to be put away. Put things into a bucket or container, and place it into a cupboard or drawer somewhere out of the way.

When the surfaces are free from clutter, you can work so much faster and give a more thorough cleaning.

2. Starting From the Back of the House

Some professional cleaners may clean according to the room type. For example, they’ll do all the bathrooms first. But to be the most efficient, it’s better to start at the back of the house, and work your way to the entryway, or wherever you’ll be exiting from.

If you don’t follow this method, you’ll be moving back and forth between rooms at different ends of the house, which can cause you to miss things. It’s also not as efficient of your time or energy lugging all of your equipment from room to room.

And this way, you’re always moving in one direction — that is, to the exit.

3. Working Left to Right, Top to Bottom

Whatever room you’re in, it’s always best to start cleaning in the far top left-hand corner from the entry point. Then working left-to-right around the room, also known to some as the Spiral Cleaning Method, tackle every surface on your way back to the door.

Cleaning this way prevents you from missing any areas. And it avoids erratic cleaning, keeping your movements methodical and structured, enabling you to move faster through a room.

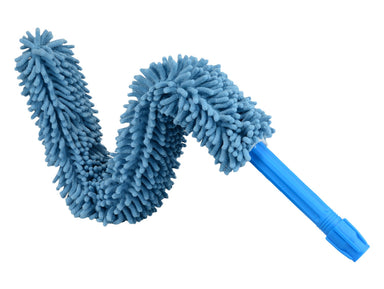
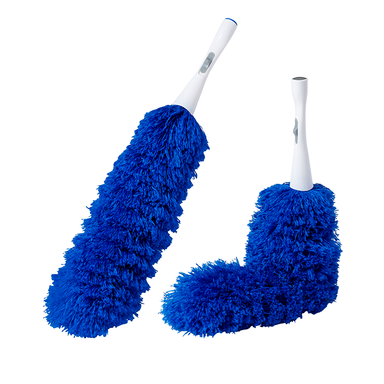
Always dust first, wipe down furniture and countertops, and vacuum or dust mop, and wet mop floors as a last step.

Starting up high allows gravity to force any airborne particles to lower ground. So by the time you get to cleaning the floors, you’ll have collected any residue along the way.

4. Using High Quality Supplies

The fourth thing which is, in my opinion, one of the most important pieces to a successful cleaning routine is the tools you use. So many professionals use cheap supplies, but these end up costing you more in the long run as they don’t last long, they clean poorly, and make you work harder.

If you own a cleaning company and employ cleaners, they also know the difference between the good quality and bad, i.e. they’ll know when you’re being cheap.

Not using professional quality supplies could also tarnish your reputation. Imagine your customers continuously coming home to scratched stainless steel appliances and streaky floors all because their cleaners used low quality products.

High quality microfiber towels do most of the heavy lifting when cleaning, which means you can clean with just water. It’s only when you want to disinfect a surface that you need to whip out your chemical solutions. So it really pays to invest in better quality supplies.

Step-By-Step Professional Cleaning Checklist

Now on to the checklist for cleaning a home like a professional. Following the general rules mentioned above — from the back of the house, and left to right, top to bottom — let's get cleaning.

Tools We Recommend

Bathrooms

Bathrooms are one of the dirtiest places in the home that require disinfecting. But be mindful of “dwell time,” which is how long a chemical needs to sit on a surface undisturbed to effectively kill germs and bacteria.

It'll say how long on the instructions — ten minutes is a good rule of thumb. But it’s inefficient of your time to wait around for the disinfectant to work its magic, so instead, follow this checklist in order so you can maximize the time you spend cleaning the bathroom.

  1. ✔︎ Dust using a microfiber duster.

  2. ✔︎ Wipe down all surfaces with a dry microfiber towel to pick up dust and hair.

  3. ✔︎ Liberally spray the toilet bowl, seat, and sink with disinfectant solution — do not wipe, yet.

  4. ✔︎ Spray shower and bathtub with cleaning solution — allow it to soak.

  5. ✔︎ Wipe down the counters with a damp microfiber towel.

  6. ✔︎ Tidy up towels, toilet paper rolls, etc.

  7. ✔︎ Wipe down the mirrors with a damp microfiber towel, and polish with a glass cleaning cloth.

  8. ✔︎ Scrub shower and tile grout using a grout brush (learn how to clean grout without scrubbing).

  9. ✔︎ Scrub the toilet bowl with the toilet brush — allow brush to drip dry under the toilet seat.

  10. ✔︎ Wipe down the toilet from top to bottom with a microfiber towel.

  11. ✔︎ Empty the trash can.

  12. ✔︎ Dust and wet mop the floor with a compact-sized microfiber dust and wet mop kit.

We recommend using different colored microfiber towels to prevent cross-contamination. E.g. red for high-risk surfaces, yellow for countertops, blue for dusting, for example.

Freaked out about using your good microfiber towels on toilet bowls? Try using disposable microfiber cloths instead. They're far more effective than paper towels, and 100% lint-free.

Kitchen & Laundry

The kitchen and laundry are usually in close proximity to one another in a home, and have similar surfaces, so let’s cover them together. It’s good to use a disinfectant on kitchen countertops because food is prepared on the surface. So, like we did in the bathroom, spray your solution and allow it to sit for around 10 minutes before wiping up.

Items like the oven, fridge, and dishwasher aren’t typically included in a routine maintenance clean.

For a routine clean of a kitchen and laundry, follow these steps.

  1. ✔︎ Dust using a microfiber duster.

  2. ✔︎ Wipe down appliances using a damp microfiber towel.

  3. ✔︎ Spray cupboards, backsplash, and countertops with cleaning solution — allow dwell time.

  4. ✔︎ Wipe down the inside and outside of the microwave using a damp microfiber towel.

  5. ✔︎ Clean the stovetop with a microfiber towel. Use scraper on stuck-on messes if it’s a glasstop stove.

  6. ✔︎Wipe down the fridge with a damp microfiber towel, follow with a microfiber polishing cloth for stainless steel.
  7. ✔︎ Wipe down any furniture with a damp microfiber towel.

  8. ✔︎ Scrub the sink down with cleaning solution like BKF and a scrubbing sponge.

  9. ✔︎ Wipe down cupboards, backsplash, and countertops with microfiber.
  10. ✔︎ Empty the trash can.

  11. ✔︎ Dust and wet mop the floor with an 18” microfiber dust and wet mop.

Bedrooms and Study

Bedrooms and studies are a generally easier to clean than other parts of a home because the most time a person spends there is when they’re sleeping or busy working. The main focus is on dusting and tidying up more than anything else.

  1. ✔︎ Dust with a microfiber duster, including the ceiling fan, lamp shades, bedside tables, etc.

  2. ✔︎ Make the bed, tidy the desk, etc.

  3. ✔︎ Empty the trash can.
  4. ✔︎ Vacuum carpet and rugs.

  5. ✔︎ Dust and wet mop hard floors with an 18” microfiber flat mop kit.

Living and Dining Rooms

These areas are used more often, but are not harbors for germs and bacteria like kitchens and bathrooms can be. Removing dust and cleaning the floor should be the dominant focus, as the constant foot traffic can create messes. And if there are little ones crawling around, it’s important to clean the floor thoroughly.

  1. ✔︎ Dust using a microfiber duster, including ceiling fans, lamp shades, light fixtures, picture frames, window sills, bookshelves, etc.

  2. ✔︎ Using a damp microfiber towel, wipe over mantles, tables, and other furniture.

  3. ✔︎ Tidy up any furnishings, like throw cushions and blankets, coffee table, etc.

  4. ✔︎ Vacuum carpet and rugs.

  5. ✔︎ Dust and wet mop hard floors with an 18” microfiber flat mop kit.

Cleaning House Like a Pro

Whether you’re a cleaning professional or enthusiast, you’ve now learned the ways of the warrior, err… cleaning professional. Always declutter first; start at the back of the house; work top to bottom, left to right; and invest in high quality supplies.

I hope this checklist inspires you to improve your cleaning routine.

The Cleaning Company Starter Kit

We’ve curated a cleaning kit of our top products that our professional cleaning customers purchase over and over again. It contains three full days’ worth of high quality supplies for one cleaner, including four types of microfiber towels, microfiber dusters, scrubbers, heavy duty mops, and a laundry bag.

All this would usually cost you $500. Get it for $299.

Easiest Way To Mop Your Floors


Productos relacionados

  • Featured Articles

    product_12-x12-buff-pro-multi-surface-cleaning-cloth-12-packproduct_16-x16-buff-pro-multi-surface-microfiber-towel-12-packproduct_16x16-disposable-microfiber-cloths-case-of-500product_16x24-microfiber-waffle-towel-6-packproduct_mwipes-reusable-microfiber-wipes-box-of-50-10x12-blue-case-of-8product_pack-of-48-16-x16-buff-pro-multi-surface-microfiber-towel 4 Signs You Need to Replace Your Microfiber Towels
    9 Common Surfaces That Require Extra Care When Cleaning
    product_10-chenille-microfiber-dust-mop-pad-2-packproduct_12x12-disposable-microfiber-cloths-50-packproduct_chenille-microfiber-high-duster-cover-2-packproduct_microfiber-wall-wash-mop-pad-3-packproduct_pack-of-48-16-x16-buff-pro-multi-surface-microfiber-towelproduct_premium-mini-microfiber-mop-system How to Wash Painted Walls Like a Pro
    Preguntas frecuentes

    Encuentre respuestas a nuestras preguntas más frecuentes.

    Vídeos sobre cómo hacerlo

    Vea cómo utilizar su microfibra de forma eficiente y eficaz.

    Artículos

    Artículos y consejos técnicos sobre el mejor uso y cuidado de su microfibra.

    Entrevistas

    Aprenda las mejores técnicas de limpieza de microfibras de la mano de profesionales expertos.