Ir al contenido
Step-By-Step Cleaning Guide for Living Areas

Step-By-Step Cleaning Guide for Living Areas

Maybe you’re teaching someone new on your team how to clean. Perhaps you’re teaching yourself how to clean a living room room.

Or, you might be arguing with a roommate or spouse over what’s the right way to clean whatever it might be. Whatever the reason, you don't want fluff, you want answers.

What you can all agree on, though, is that you need towels. Not just any towels, but microfiber towels.

Our Best Microfiber Towels for Living Areas

#1 Best All-Purpose Towel #2 Best for Final Polishes #3 Best for Streak-Free Finishes

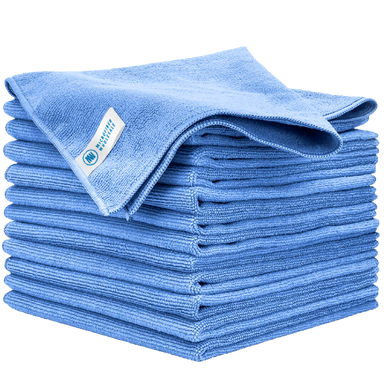
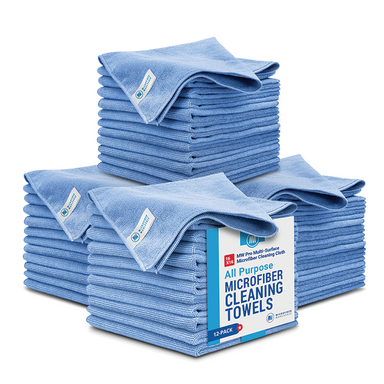
16”x16” MW Pro Multi-Surface Microfiber Towel - Pack of 12

Toalla de microfibra Buff™ Detail 400 GSM (Gramos por metro cuadrado) de 16"x 16".

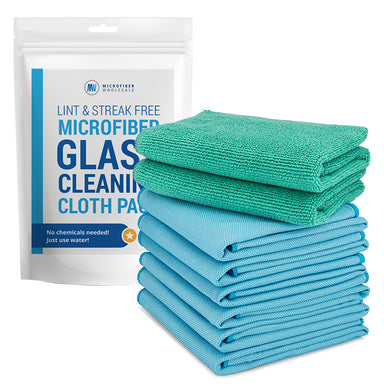
Paño de microfibra para limpiar cristales de 16" x 16" 

⭐⭐⭐⭐⭐

⭐⭐⭐⭐⭐

⭐⭐⭐⭐⭐

16”x16” MW Pro Multi-Surface Microfiber Towel Toalla de microfibra Buff™ Detail 400 GSM (Gramos por metro cuadrado) de 16"x 16". Paño de microfibra para limpiar cristales de 16" x 16" 

Best for: 

  • Wiping your coffee table as you don't want dust building up on this surface
  • Lifting fingerprints off your TV and other house electronics
  • Dusting down the bed frame and the headboard in your bedroom

Best for:

  • Buffing the wooden bookshelf to restore its natural shine
  • Polishing the nightstand in your bedroom after dusting it off
  • Drying the mirror in your guest cloakroom for the best first impressions

Best for:

  • Removing smudges from the glass furniture in your dining area
  • Cleaning reflective surfaces like trophies in a display cabinet
  • Drying the windows in your living space leaving them squeaky clean

Today we're going to look into some cleaning steps that can be applied to any general living space and give you spotless results quickly and easily every time.

Furthermore, we're also going to discuss:

  • The correct supplies you need to make your house sparkling clean effortlessly
  • The spiral technique that's going to ensure you never miss any spot while cleaning
  • Discover the secret to achieving a lint free and streak free glass surface

Ready? Let’s do this.

How to Use the Spiral Cleaning Method for Living Rooms

Wondering how to clean a living room in a way that maximizes efficiency and thoroughness?

Consider this, if you approach cleaning in a structured, systematic way, you'll drastically improve efficiency and thoroughness, especially in the living areas.

You see, the spiral cleaning method paves the way for a cleaning routine that's straightforward to learn, a breeze to remember, effective, and works in harmony with nature’s most powerful force: gravity.

Now, to adopt the Spiral Method in the living areas, begin at the top left corner of the room and let your hands guide you through five methodical revolutions.

  1. The first revolution zeroes in on high dusting, wiping away cobwebs and dust from light fixtures, fans, and any high display units or shelves.
  2. The second round hones in on wall decorations, bookshelves, and electronics, ensuring all your cherished possessions and gadgets are free of smudges and dust.
  3. The third revolution concentrates on seating areas, coffee tables, beds, and other central furniture, where daily usage can lead to an accumulation of dust and random debris.
  4. The fourth cycle addresses storage units, side tables, and any lower fixtures where unnoticed spills and dust may gather.
  5. The fifth and final rotation attends to baseboards, carpets, and floors, sweeping up any remnants that have descended during the previous revolutions.

Now, you see, each sweep of the spiral builds upon the previous one, ensuring no nook or cranny is overlooked and utilizing gravity to shift dirt and debris downward naturally.

Amazingly, this technique amps up your speed because you don’t have to slow down to avoid dropping dust and crumbs, as everything you miss just drops down to a yet-to-be-cleaned dirty area.

What Are the Benefits of the Spiral Cleaning Method?

Here's the simple beauty of this cleaning method:

  • Systematic: You get a well-structured approach that results in thorough cleaning because no area is overlooked.
  • Time saving: Since Spiral Cleaning moves from top to bottom, the method helps you work more quickly because there's no wasted back-and-forth.
  • Peace of mind: Nothing takes away your peace of mind faster than a random thought suggesting you left a place uncleaned. If you struggle with keeping track of completed tasks, this method tackles all areas, and your mind can be at ease.
  • Preventative maintenance: Because Spiral Cleaning addresses high areas first, it ensures these high surfaces always stay clean, reducing the need for heavy cleaning in the future. Other cleaning methods mostly focus on the floor and lower surfaces, leaving dirt to accumulate in high places.
  • Clutter management: By using this method, you're primarily focusing on one task before starting the next. You eliminate the possibility of cluttering items.

"These are great. The extra size is nice for wiping up anything from spills to counters, to toilets. I got several colors and assigned them their spot in the bathroom or kitchen. And shipping was SUPER fast. I think I got them in 3 days." - Megan Arner, Verified Buyer

How Often Should You Complete a Spiral Clean?

How do you clean your rooms and make the experience more organized and enjoyable? You can set daily, weekly, and monthly priorities for various tasks as shown in the table:

Frequency Task Descripción
Daily Dusting Wiping down countertops, tabletops, and other surfaces using a dry microfiber cloth
Daily Vacuuming or sweeping Removing dirt and debris from the floor using a vacuum cleaner, broom, or dry microfiber mop
Weekly Deep cleaning floors Mopping floors with a microfiber mop and detergent or cleaning agent
Weekly Changing bed linens Washing, ironing, and replacing bed linens
Weekly Window cleaning Wiping down and polishing all windows and mirrors
Monthly Upholstery cleaning Vacuuming sofas and other upholstery
Monthly Appliance cleaning Deep cleaning ovens, fridges, and microwaves

1 - Tables, Nightstands, and other Modern Wood Furniture

Wood is charming and elegant. It has the power to transform any room into a warm, cozy space that looks and feels inviting.

Caring for modern wood furniture isn't just about preserving the wood's aesthetics. Whenever you clean it with the right products and apply proper techniques, you're preserving the wood for years to come.

What supplies do you need?

Cleaning Steps

Step 1: DAMPEN DIRECTLY

Lightly spray the microfiber towel with the cleaner or wet it with warm water and wring it out VERY thoroughly. Avoid spraying the furniture directly to prevent water spots.

Step 2: PREP A LANDING PAD

First, begin by quickly wiping an empty staging area on a portion of the table. You will use this area to move objects out of the way as you clean.

Step 3: LIFT AND DUST

Secondly, pick up any items atop the furniture. Using the damp microfiber towel, dust the bottom of the item and place it in the staging area.

Step 4: GO WITH THE GRAIN

Wipe the surface in the direction of the grain. For furniture with intricate designs, use the soft-bristled brush pressed into the back of the towel to clean the grooves.

Step 5: BUFF AND SHINE

Using a dry polishing microfiber towel, buff the surface to restore the wood's natural shine. You can apply a small amount of polish to the towel at this step.

Step 6: REPLACE AND REARRANGE

Finally, return all items from the staging area, placing them attractively as you work (see How to Clean & Style Living Spaces for details).

Professional Tips: Be very careful to minimize water usage and dry thoroughly when cleaning wood to avoid water spots. For details on cleaning wood and special instructions for antiques, read How to Clean Wood Furniture Safely.

"I use this cloth to buff the wax off my car and to polish my furniture. It does an excellent job at both tasks. These are hefty well-made cloths, not thin like other brands I have used." - Kevin Walsh, United States

2 - Cleaning Steps for TV And Computer Screens

Our computers and televisions are a big part of our lives. However, we often neglect cleaning them, except for the occasional quick wipe-down when smudges on the screen become too visible.

Besides obscuring the screens' clarity, the fingerprints and smudges carry a lot of germs. So, when you clean your television and computer screens well, you're not only eliminating dirt, but you're keeping your home germ-free at large.

What supplies do you need?

How to Clean Your Room: TV and Computer Screens

Follow these cleaning steps:

Step 1: POWER DOWN

Before anything else, ensure the device is turned off.

Step 2: DAMPEN DIRECTLY

Lightly spray the microfiber towel with the cleaner or wet it with distilled water and wring it out VERY thoroughly. Avoid spraying the technology directly to prevent water damage to the electronics.

Step 3: GENTLE SWIPES

Wipe the screen from top to bottom with the multi-surface towel, rubbing out fingerprints and smudges. Be careful not to push water into seams and cracks and not to rub too aggressively. Watch out for jewelry scratching as you work.

Step 4: BUFF & SHINE

Use a dry glass towel to buff out any streaks and remove any moisture from the screen to leave a residue and lint-free shine.

Professional Tips: Avoid using regular glass cleaners or multi-surface cleaners on screens, as they can damage the coating. If absolutely necessary, a very tiny amount of dish soap can be used with the distilled water.

"I have absolutely fallen in love with these towels. I gave one from my order to my Dad (who couldn't find anything that didn't leave a streak in 3 years for his 3D 70" TV). I cleaned his TV with it using only water and his jaw hit the floor. They are a great product at a great price. And customer service was fast and friendly." - Amber Carter, Verified Buyer

3 - Ceiling Fans, Light Fixtures and Other High Surfaces

As you clean your living areas, you're more likely to focus on lower surfaces such as furniture and floors. The light fixtures, air vents, ceilings, and fans often get neglected.

Consider this: high spaces often harbor allergens, and cleaning them promotes fresh air. Fans are the most notorious for circulating allergens as they rotate high up in the ceiling.

Learn below how to clean these high surfaces.

What supplies do you need?

How Do I Do It Right?

Step 1: POWER DOWN

First of all, ensure that fans and light fixtures are turned off.

Step 2: DRY DUST OR DAMPEN DIRECTLY

Then, dry dust if items are only in need of maintenance cleaning. For neglected items, lightly spray the microfiber duster with the cleaner OR wet it with water and wring it out VERY thoroughly.

Step 3: FANCY FOLD AND REACH OUT

Fold the chenille duster into a flattened “C” shape to wrap around fan blades or a flattened upside-down “U” for light fixtures and cobwebs. Extend the duster pole till you can reach the item while holding the pole with both hands at a slight angle.

Step 4: SWEEP & SWIPE

Gently work the duster around the light fixtures, opening the duster to fit in small spaces. For fans, dust each blade from tip to base, pushing the blade through the center of the “C” and back. Push the cleaned blade aside and repeat till complete.

Step 5: DAB THE DETAILS

Gently work the duster around the lights and motor, removing dust and cobwebs. Open the duster to an “L” shape to wipe the top of the fan motor.

Step 6: CLEAR THE COBWEBS

Use the duster to run it along the top border of the walls and into corners to address cobwebs and dust.

Professional Tips: Cleaning fans monthly can reduce allergens, improve air quality, and eliminate the need for damp cleaning.

4 - Mirrors and Glass Tables

Clean mirrors and glass furniture contribute to the overall appearance of a room. Most people love them for the illusion of the wide space they create, and thanks to their gleaming surfaces, they reflect light and brighten everything around them.

However, their tendency to show fingerprints and smudges more easily than other surfaces like wood means they require proper cleaning.

Let's show you how to.

How to Clean Mirrors and Glass Tables

DAMPEN DIRECTLY

First, lightly spray the multi-surface microfiber towel with window cleaner OR wet it with distilled water and wring it out thoroughly. Avoid spraying the mirror directly to prevent water damage to the mirror frame.

GENTLE SWIPES

Wipe the glass from top to bottom with the multi-surface towel, rubbing out fingerprints and smudges. Be careful not to push water into the frame or behind the mirror to avoid wood and mirror rot. Watch out for jewelry scratching as you work.

BUFF & SHINE

Finally, use a dry glass towel to buff out any streaks and remove any moisture from the glass to leave a residue and lint-free shine.

Professional Tips: Cleaning with distilled water actually causes fewer streaks than window cleaners. High-quality microfiber is actually what controls streaks and lint. For large mirrors, work in sections to ensure thorough cleaning.

5 - Making Beds and Changing Linens

A well-made bed with fresh linens and neatly arranged pillows is enough to evoke calmness.

The bed is the focal point in a bedroom, and when it's in order, you've successfully checked off the major task on your bedroom cleaning checklist.

Changing your linens frequently also protects your mattress from absorbing dirt and body oils, thereby preserving its integrity.

What supplies do you need?

How Do I Do It Right?

Here are the cleaning steps to follow:

Step 1: STRIP DOWN

Remove old linens, pillows, and blankets.

Step 2: DRY DUST OR WET WIPE

Dry dust the bed frame and headboard with the multi-surface towel. If it is a hard material like wood or metal and heavily soiled, dampen the towel lightly with warm water or an all-purpose cleaner to remove the soil, and then dry it with a fresh towel.

Step 3: FITTED FIRST

Spread and tuck in the fitted sheet, ensuring no wrinkles. Start with the hardest corners to reach if the bed is pressed against the wall or in the corner of the room.

Step 4: FLAT FACE DOWN

Place the flat sheet with the attractive edging or pattern facing down onto the bed, with the finished edge touching the top of the mattress. Fold the top edge back 6” and then tuck all three sides of the sheet tight under the mattress.

Step 5: BLANKETS BENEATH

Layer any warming blankets on top of the flat sheet at the same time so both are folded over on the top and tucked in on the edges together.

Step 6: TOP LAYER TUCK-LESS

The top layer of the comforter, duvet, or bedspread should be smoothed out evenly across the bed. Be careful not to leave wrinkles or exposed tags for a polished look.

Step 7: PILLOW TALK

Replace pillowcases. Fluff, smooth, and position pillows standing up against the headboard, with sleeping pillows in the back and decorative pillows in front, in a symmetrical arrangement with a center point.

Step 8: FINAL TOUCHES

Finally, return any bed decorations, such as throw blankets or stuffed animals, in a folded and neat arrangement. Blankets are usually draped at the bottom edge, and stuffed animals are placed in front of the pillows. (See How to Clean & Style Living Spaces for details.)

Professional Tips: Bedding should be changed and laundered a minimum of twice a month. Consider using mattress and pillow protectors to guard against allergens and spills.

"I ABSOLUTELY LOVE these towels. They work great at cleaning everything without leaving any lint or debris behind. And they're great at not scratching up your furniture, and they're great when it comes to washing them and getting them clean. I would recommend these to anyone. And the price is EXCELLENT." - Macho Men Maid Service, Verified Customer

Bonus: General Tips for Cleaning Living Areas

Ready to chill? Put your feet up? In the space where you truly relax, entertain guests, play games, and create lasting memories?

Below are a few more tips to ensure that you really do benefit from all the work you've just done via the Spiral Cleaning Method.

  • Make a checklist of cleaning tasks on a daily, weekly, and monthly basis. This will clean your mind!
  • Remove items that don't belong in the room you're cleaning to save you time spent on shifting them around. Not sure where they go? Grab a giant basket and throw them in the 'later' pile.
  • Gather all the cleaning supplies you need before you start. It will save you time from walking back to the laundry to collect something you've forgotten. (Unless of course, you're deliberately adding steps to your step counter!)
  • Use the right products to avoid damaging your previous things. For instance, if you're cleaning wood, use a wood cleaner. Similarly, use glass cleaners for glass surfaces.
  • Vacuum or sweep beforehand. If you don't do vacuum or sweep, you'll have to mop over dirt and debris, which creates an even muddier mess when it comes in contact with water.
  • Don't overlook baseboards, air vents, light fixtures, and other areas. Pay attention to detail in every area.
  • Keep doors and windows open or turn on the fans so that toxic fumes are sucked outside and fresh air is replenished inside. Stay healthy while you clean.

Put these tips into practice, and you'll work more easily and keep your living areas looking their best at all times.

So, as we wrap up this meticulous journey through living area cleaning, it's evident that the right cleaning steps and tools, especially the indispensable microfiber, can make all the difference in ensuring your spaces not only look clean but truly and thoroughly spotless.

Preguntas frecuentes

Encuentre respuestas a nuestras preguntas más frecuentes.

Vídeos sobre cómo hacerlo

Vea cómo utilizar su microfibra de forma eficiente y eficaz.

Artículos

Artículos y consejos técnicos sobre el mejor uso y cuidado de su microfibra.

Entrevistas

Aprenda las mejores técnicas de limpieza de microfibras de la mano de profesionales expertos.

Continue To Cart Continue To Customize

By continuing with your order, you acknowledge and agree to the following:

Our property-marked towels are printed with a repeating pattern, and logo placement may vary from towel to towel.

You’ve chosen between receiving an emailed digital proof for a detailed review of your design at an additional cost of $20, or allowing our print team to use your uploaded file to prepare your order for printing.

We do not accept returns for printed property marked towels.