Ir al contenido
The Ultimate Laundry Guide

The Ultimate Laundry Guide

Disclosure: This post may contain affiliate links.

Laundry is a necessary chore that, when done correctly, keeps your garments and linens looking fresh and lasting longer. Whether you're a laundry novice or a seasoned pro, there's always room for improvement.

We’ve put together this simple yet thorough guide where we go through every step of the laundry process, from sorting your clothes to drying them properly. We've also included a bonus section on how to correctly wash and dry microfiber to prolong its life and effectiveness.

Let’s dive in!

15 Steps to Doing Laundry

1. Create a Schedule

The first thing you should do before diving into doing laundry is to establish a regular laundry routine. This helps prevent laundry from piling up. For example, doing laundry on specific days of the week can make the task more manageable.

2. Sort Laundry in Advance

Another important step to doing laundry is to use separate hampers for whites, lights, and colors. You can also separate similar fabrics, such as cottons, synthetics, delicates, and heavy fabrics like towels and jeans. And consider keeping heavily soiled items separate from lightly worn clothes to ensure effective cleaning.

Separating your items can save you a lot of time when it's time to do laundry

Laundry Tip 1: Put a dry erase calendar on your wall to keep track of your laundry schedule and delegate laundry tasks to family members.

3. Use Energy-Efficient Appliances

Investing in high-efficiency washers and dryers is another way to save time, energy, and money on your electricity bill. Look for the energy rating when choosing your appliances.

For those of you with existing appliances, you can reduce the energy usage by:

      • Washing in cold water where possible
      • Washing in full loads
      • Cleaning dryer filter regularly
      • Using dryer balls
      • Not overloading your dryer
      • Hanging items to dry whenever possible

4. Choose Your Detergent

Selecting a detergent is another important step when doing laundry. Choose High-Efficiency (HE) Detergents to prevent excess suds, opt for fragrance-free or hypoallergenic detergents if you’ve got sensitive skin. Look for detergents with added stain-fighting enzymes for tough stains.

If you’re a gym junkie or work in a laborious job where your clothing gets sweaty and stinky, get some enzyme laundry booster to help neutralize odors.

5. How to Pre-Treat Stains

Addressing stains as soon as they occur prevents them from setting in, making them easier to remove. Identify the stain before using anything on it as some stains can become worse if the wrong product is used. Here's how to pre-treat stains:

Identify the Stain: Determine the type of stain (oil-based, protein-based, dye, etc.) to choose the best treatment.

Apply Stain Removers: Apply a stain remover or a pre-treatment spray directly to the stain. Gently rub the fabric together or use a soft brush to work the product into the stain.

Let it Sit: Allow the pre-treatment to sit for at least 5-10 minutes, but avoid letting it dry on the fabric.

Check Care Labels: Always check the care labels on your garments to ensure that the pre-treatment method is safe for the fabric.

Here are some of the most common stains and the best way to remove them:

Laundry Tip 2: Refrain from using the dryer on items that have stains until the stain is completely removed as the heat can set a stain into fabric, making it impossible to remove.

6. How to Soak Laundry

Whether they are stained or just smelly, soaking your laundry can help loosen tough stains, dirt, and odor before washing. Here’s how to do it properly:

Fill a Basin or Sink: Use warm or cold water, depending on the fabric type and stain.

Add Detergent or Soaking Agent: Add a small amount of detergent or a soaking agent to the water and mix well.

Submerge the Garments: Fully submerge the stained or heavily soiled items and let them soak for 30 minutes to overnight, depending on the severity of the stains.

Rinse: After soaking, gently squeeze out excess water and rinse the garments before adding them to the washing machine.

7. Use Correct Settings

Not knowing which settings to use on your washer and dryer is more common than you think. But it can make a big difference to your laundry when you use the correct settings.

Cold Water

Best for dark colors, delicates, and lightly soiled items to prevent shrinking and color fading.

Warm Water

Ideal for synthetic fabrics and moderately soiled garments.

Hot Water

Use for whites, bed linens, and heavily soiled items to kill bacteria and remove tough stains.

Cycle Settings

Choose delicate, normal, or heavy-duty based on the fabric type and soil level.

8. Optimize Loads

Running full loads rather than small ones saves water, energy, and time. However, overloading the machine can lead to inefficient cleaning and increased wear on clothes.

9. Dry Items Correctly

Drying your items properly can significantly prolong the life of your laundry. In an ideal situation, air drying is best for most things. But it isn’t always possible if you live in an apartment or a city prone to rain or bad weather. Instead, follow these guidelines.

Air Drying

If we could air dry all of our laundry, it would last longer and we’d put less strain on the environment. But it’s not feasible in many homes.

So if you aren’t able to air dry your laundry, at the very least do it for your delicate items, knits, and garments that are prone to shrinking.

Tumble Dry

We’ve all had a shirt or a favorite sweater fall victim to a poorly-used dryer. So for delicate fabrics, use a lower heat setting, and higher heat for towels and heavy items. And always check garment care labels for specific instructions.

Remove Promptly

Most dryers will have a Wrinkle Guard setting where, once the dryer has finished its cycle, it rotates the drum every so often to prevent items from creasing. This is a great feature if the dryer’s set to finish when you’re not at home. But ideally, you want to take items out of the dryer promptly to avoid wrinkles and reduce the need for ironing.
10. Delegate When Possible

If you’re a busy individual or you’ve got kids, sometimes laundry is low on the priority list and can easily get out of hand. So don’t be afraid to delegate laundry to family members or outsource to a laundry service.

Getting help with your laundry load will help you stay on top of things.

11. Streamline Folding and Sorting

A small hack to optimizing your laundry is to fold clothes as soon as they come out of the dryer. This prevents wrinkles and reduces the time needed for ironing.

Sorting clothes by owner or type before folding can also save time.

12. Minimize Ironing

Ironing can be a tedious chore, but fortunately, there are several effective strategies to minimize the need for it and keep your clothes looking neat and wrinkle-free. Wrinkle-release sprays are a convenient solution for eliminating wrinkles without using an iron. OPt for wrinkle-resistant fabrics, like treated cottons and synthetic blends, to save you time and effort in maintaining a smooth wardrobe.

13. Stay Organized

Keep your laundry room and supplies organized and within reach to streamline the process. Installing shelves or cabinets, and utilizing storage containers will ensure your laundry room stays organized and is easy to keep clean and tidy.

Designating a specific area for laundry tasks can also help. For example, you can create a space for sorting and folding and another area for ironing.

14. Use Technology

These days there’s an app for just about everything. Some modern washers and dryers are designed with an app that notify you when a cycle is complete.

Leveraging technology to do your laundry is a great example of working smarter and more efficiently.

15. Maintain Appliances

Regularly cleaning the washing machine and dryer ensures they run efficiently and reduces the risk of breakdowns. A build up of mold and mildew can also build up inside your washer if you don't clean and air it out after use.

How to Properly Wash and Dry Microfiber

This post wouldn’t be complete without a section on microfiber. As you know, microfiber is fantastic for cleaning, but it requires special care to maintain its effectiveness and prolong its life. So here is a quick guide on how to properly wash and dry your microfiber.

Washing Microfiber

Use a Mild Detergent: Avoid fabric softeners and bleach, as they can damage the fibers.

Cold or Warm Water: Wash microfiber items in cold or warm water to prevent fiber damage.

Separate Load: Wash microfiber separately to avoid lint transfer from other fabrics.

Drying Microfiber

Air Dry: The best method is to air dry microfiber to prevent heat damage.

Low Heat Setting: If you use a dryer, choose a low heat setting and avoid dryer sheets, which can coat the fibers and reduce their effectiveness.

Doing Laundry Like a Pro

Mastering the art of laundry can make a significant difference in the longevity and appearance of your clothes and linens. By following this ultimate guide, your laundry will be sorted, washed, and dried with the care they deserve. And with our additional tips on microfiber care, your cleaning cloths will remain in top condition, providing effective cleaning every time.

Happy laundering, friends!

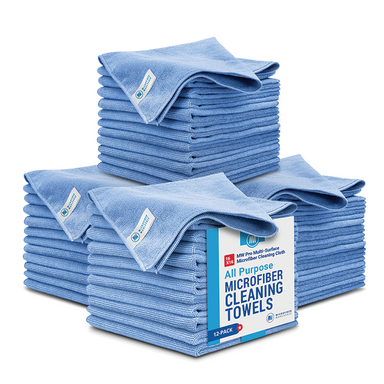
Our best selling towels in 48 packs

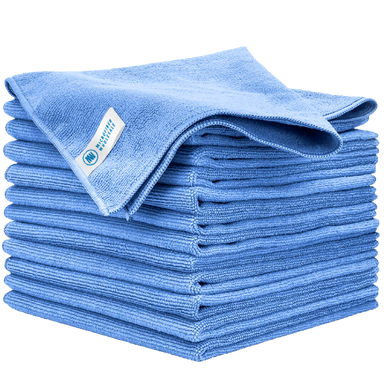
Our MW Pro Multi Surface Microfiber Towels are the holy grail of cleaning tools. Professionals don't clean without them, and they're a must-have in every cleaning arsenal. Buy bulk and save big!

The 12"x12" is the perfect compact size for tackling smaller surfaces and items, like ornaments and bookshelves.

The 16"x16" allow you to clean larger areas like countertops and windows quickly without needing to replace towels frequently.

Preguntas frecuentes

Encuentre respuestas a nuestras preguntas más frecuentes.

Vídeos sobre cómo hacerlo

Vea cómo utilizar su microfibra de forma eficiente y eficaz.

Artículos

Artículos y consejos técnicos sobre el mejor uso y cuidado de su microfibra.

Entrevistas

Aprenda las mejores técnicas de limpieza de microfibras de la mano de profesionales expertos.

Continue To Cart Continue To Customize

By continuing with your order, you acknowledge and agree to the following:

Our property-marked towels are printed with a repeating pattern, and logo placement may vary from towel to towel.

You’ve chosen between receiving an emailed digital proof for a detailed review of your design at an additional cost of $20, or allowing our print team to use your uploaded file to prepare your order for printing.

We do not accept returns for printed property marked towels.