Ir al contenido

Your Cart

Add More. Save More. Ship Free.

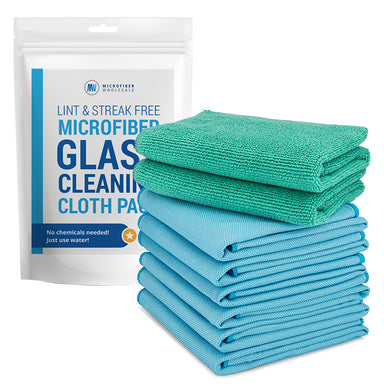
Pack de microfibra para limpieza de cristales

$16.98

5x7 Microfiber Lens & Glass Cleaning Cloth - 2 Pack With Case

$7.98
Seleccione el color: Paisley

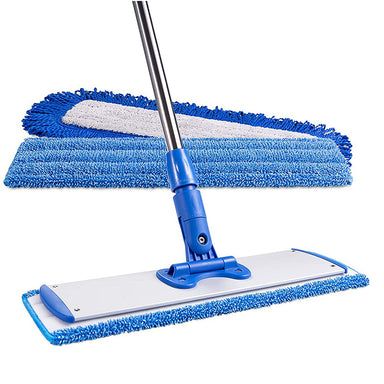
10" Microfiber Scrubber Mop

$13.98

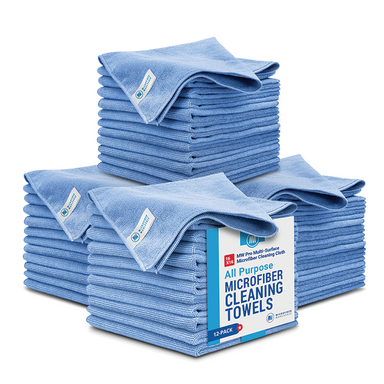
Toalla de microfibra Buff™ Detail 400 GSM (Gramos por metro cuadrado) de 16"x 16".

$19.98
Seleccione el color: Gris
A modern shower tiled from floor to ceiling

How The Pros Make Grout Lines Look Like New

Disclosure: This post may contain affiliate links.

As a cleaning professional, you know this all too well: a client’s bathroom or kitchen can be spotless, but if the grout is stained or dingy, the whole space still feels dirty. Grout lines hold onto moisture, grime, and mildew, making them one of the most common problem areas in deep cleans.

Fortunately, with the right tools, products, and maintenance strategies, you can restore grout to like-new condition, and keep it that way for your clients.

Here’s a pro-level game plan to tackle even the grimiest grout lines and deliver results that wow.

Person using a green steam cleaner on a white floor.

Use Pro-Grade Grout Cleaning Tools & Techniques

To get the best results, you need more than elbow grease; you need the right tools. Here’s what seasoned pros use for faster, deeper grout restoration:

Absolutely! Here’s a beefed-up, more detailed version of each section, with added technical depth, professional insight, and persuasive language to reflect your audience of cleaning pros:

Steam Cleaners: Deep Cleaning Without the Chemicals

Steam cleaners are a must-have in any pro’s grout-cleaning arsenal. Using superheated vapor (typically over 200°F), these machines blast away years of embedded grime, mildew, and bacteria, without relying on harsh chemicals that can irritate clients or damage tile finishes.

They're especially valuable in environments where ventilation is limited or where clients have sensitivities to strong odors.

For maximum impact:

      • Use a detail nozzle attachment to concentrate steam directly into the grout lines.
      • Pair with a microfiber cloth attachment to lift loosened debris instantly.
      • Work in small sections to ensure consistent results and prevent residue from resettling.

Steam is particularly effective in tile showers, bathroom floors, and commercial kitchens, where moisture and organic buildup are common. Plus, it sanitizes as it cleans, an added selling point for clients who prioritize hygiene.

Grout Brushes with Stiff Bristles: Precision Scrubbing for Better Results

Forget general-purpose scrubbers. When it comes to grout, specialized grout brushes with stiff, angled bristles make a noticeable difference.

These tools are designed to dig into narrow grout lines without scratching adjacent tile surfaces, providing deeper, more efficient agitation.

Look for:

      • Ergonomic handles that reduce hand fatigue during long jobs.
      • V-shaped or tapered bristles that fit into tight spaces and corners.
      • Durable, chemical-resistant materials that hold up to repeated use with strong cleaners.

Pro tip: Keep a few brush sizes on hand. Smaller ones for detailed work around backsplashes and fixtures, and larger ones for floors. For tough spots, pair the brush with a cordless drill attachment for faster, high-powered scrubbing.

How to remove tile grout with a grout brush

Alkaline or Oxygen-Based Cleaners: Safe Power Against Stains

Alkaline cleaners (high pH) and oxygen bleach products are go-to solutions for professional-grade grout cleaning, especially in kitchens and bathrooms where organic matter like grease, soap scum, and mildew tend to settle.

  • Alkaline cleaners break down oily residues and soap-based grime.

  • Oxygen bleach (sodium percarbonate) releases oxygen ions that lift stains and kill bacteria without harmful fumes or discoloration.

Why professionals prefer them:

  • They preserve the integrity of both sealed and unsealed grout.

  • Many come in gel or foam formulas that cling to vertical surfaces and extend dwell time, critical for deep penetration.

  • They're safer for colored grout and won't cause yellowing like chlorine bleach can.

Apply generously, agitate with a stiff grout brush, and allow a dwell time of at least 10 minutes before rinsing or extracting. For commercial clients or repeat jobs, choose concentrated products that can be diluted to suit the task.

DIY Paste (Baking Soda + Hydrogen Peroxide): Reliable & Client-Friendly Option

For smaller jobs, maintenance cleanings, or eco-conscious clients, the classic paste of baking soda and hydrogen peroxide remains a highly effective grout-brightening solution.

This combo works through mild abrasion and oxidizing action, breaking down stains and lifting discoloration, without the need for professional-grade chemicals.

How to use it:

      • Mix into a thick paste and apply directly to grout lines.
      • Let it sit for 10–15 minutes to allow the peroxide to bubble and loosen grime.
      • Scrub with a grout brush and rinse thoroughly.

It’s an ideal solution for:

      • Touch-up jobs between deep cleans
      • Sensitive environments (nurseries, pet areas)
      • Clients who request natural or chemical-free cleaning

While not as aggressive as commercial products, it’s a solid, budget-friendly option for professionals looking to accommodate diverse client needs.

Pro Tip: Always rinse thoroughly and extract dirty water from grout lines with a microfiber towel or wet vac to prevent resettling.

Woman marking tiles on a wall with a marker in a bathroom.

Refresh Discolored Grout with Grout Pens: Fast Visual Impact, Minimal Effort

Sometimes, even after a deep clean, grout lines remain stained or uneven in color. When regrouting isn’t an option, or the client simply wants a faster, more affordable fix, grout pens offer a high-impact, low-labor solution that delivers instant visual improvement.

These pens contain a grout-safe, pigmented epoxy or acrylic-based formula that recolors existing grout, creating a crisp, uniform finish that instantly refreshes the entire tiled surface. They’re especially effective for:

      • Real estate turnover cleanings
      • Rental property refreshes
      • Client prep for events, photoshoots, or open houses

To get professional-looking results:

    1. Clean and dry grout thoroughly before application as moisture or residue can prevent adhesion.
    2. Shake the pen well and test in an inconspicuous spot to ensure color match.
    3. Apply slowly, wiping excess off tile immediately with a damp microfiber cloth.
    4. Allow it to dry fully before sealing or exposing to moisture.

Pro Tip: Keep multiple pen colors on hand (white, beige, gray, charcoal) to match a range of common grout tones and offer clients aesthetic customization.

Recommended Grout Pens for Pros

Rainbow Chalk Grout Pen (Waterproof, Mold-Resistant)
Available in 10+ colors, this pen features a reversible 5mm/15mm nib for precision or broader coverage. Dries fast and resists mold, great for showers and bathrooms.

Rejuvenate Grout Marker Pens
Known for durability and strong pigment, Rejuvenate’s pens are perfect for high-traffic floors or heavily stained grout. Water-based and non-toxic.

These tools are also great to bundle as a touch-up add-on service, offering clients an affordable “mini-makeover” that makes your work stand out.

Offer Grout Sealing as an Add-On Service: Lock In the Clean, Boost Your Bottom Line

Restoring grout is only half the job. Sealing it is what ensures your results last.

Unsealed or worn grout is like a sponge: it quickly absorbs moisture, grime, and bacteria, leading to premature discoloration and client callbacks. By offering grout sealing as an add-on service, you not only protect your hard work, but you also create an easy upsell that adds real value for your clients.

Two Types of Grout Sealers Professionals Should Know

1. Penetrating Sealers (a.k.a. Impregnating Sealers)

These sealers soak into the porous structure of the grout, forming an invisible barrier that repels water, oil, and stains from the inside out. They're ideal for:

  • Showers
  • Bathroom floors
  • High-moisture or mold-prone areas

Penetrating sealers don’t alter the appearance of the grout and allow for breathability, especially important for older tile installations or natural stone.

Recommended Product: Aqua Mix Sealer's Choice Gold

  • Professional-grade, water-based formula
  • Safe for both sanded and unsanded grout
  • Lasts up to 15 years in residential use

2. Topical Sealers

These sit on top of the grout surface and create a visible protective coating. Many add a slight sheen, enhancing the grout’s color and giving a freshly done look. They're great for:

  • Kitchen backsplashes
  • Decorative grout work
  • Low-moisture, high-visibility areas

They do require more regular reapplication but offer excellent short-term protection and curb appeal.

Recommended Product: Miracle Sealants 511 Seal & Enhance

  • Enhances grout tone while protecting
  • Especially useful on decorative or color-treated grout

Application Tips for Professionals: Technique That Makes Your Results Last

Even the best grout sealer can fail if it's applied carelessly. For cleaning pros, sealing grout isn't just about protection, it's about precision, efficiency, and reputation.

Here’s how to ensure every seal job looks flawless and performs long-term:

Use the Right Tools for Targeted Application

Grout lines are narrow, and tile surfaces vary, from smooth ceramics to textured stone. The goal is to keep sealer exactly where it belongs: in the grout, not smeared across the tile.

Choose from:

  • Precision Applicator Bottles with or without Roller Tips: Ideal for floor tile, rolls the sealer directly into the grout line while minimizing waste.

  • Foam Brushes or Paint Wheels: Great for backsplashes and vertical applications. Foam conforms to grout depth and is disposable for quick cleanup.

  • Syringe Applicators: Excellent for tight or decorative spaces requiring pinpoint accuracy.

Pro Tip: Tape off decorative or porous tile (like marble or slate) to avoid staining from topical sealers.

Respect the Dwell and Curing Time, No Shortcuts

Every manufacturer sets specific dwell and cure times for a reason. Rushing this step compromises protection and may lead to streaking, tacky residue, or even premature failure.

      • Allow the product to sit (dwell) for the instructed time (usually 5–15 minutes) before wiping away excess.
      • Let the sealer cure fully, which can range from 4 to 24 hours, depending on the formula and humidity.
      • Restrict foot traffic or water exposure during curing to avoid disrupting the bond.

Pro Tip: Keep a laminated cheat sheet of cure times for your top sealers to streamline crew training and job planning.

Only Seal Dry, Clean Grout. Moisture is Your Enemy

Before applying sealer:

      • Ensure the grout is thoroughly dry, ideally 24–48 hours after cleaning or installation. Even light moisture can prevent proper absorption.
      • Vacuum or wipe down the grout to remove dust or residue from previous scrubbing.
      • For areas prone to dampness (showers, backsplashes), use a fan or dehumidifier to speed up drying before sealing.

Warning: Sealing damp grout can trap moisture, leading to hazing, mildew growth, or sealant failure within weeks.

Two women talking in a bathroom about cleaning supplies.

Turn Grout Sealing into a High-Value Service Line

Grout sealing isn’t just a final step, it’s a smart business move. This simple add-on transforms your grout cleaning service from a one-time fix into a long-term protection solution, helping clients preserve their investment and keeping your brand top-of-mind.

Sealing is:

      • Quick to execute (often under an hour for an average room)
      • High-margin, especially when bundled
      • Visibly impactful, leaving grout looking newer, longer

For clients, it adds peace of mind. For you, it adds recurring revenue and professional credibility.

Smart Packaging = Bigger Paydays

Incorporate sealing into your premium offerings and educate clients on its value:

      • “Restoration Plus” Package: Includes deep tile/grout clean + grout pen touch-up + full sealing.
      • Seasonal Refresh Plans: Recommend re-sealing every 6–12 months for bathrooms, kitchens, or commercial tile areas. Offer reminders or subscription options to build recurring service schedules.
      • Post-Renovation Cleans: After tile installs or remodeling projects, sealing helps lock in that “just-finished” look and protects new grout from staining.

Position It as Protection, Not Just Polish

Clients are more likely to say yes when they understand sealing as a protective measure, not a cosmetic one. Use language like:

“Sealing helps your grout resist stains, mildew, and moisture absorption, so you won’t need another deep clean anytime soon.”

Upsell Tip: Add grout sealing as a clear, line-item upgrade in your quotes or booking platform with pricing by square footage or room size. Even better, include before-and-after photos to visually communicate the long-term payoff.

Train Clients on Simple Weekly Maintenance: Protect Their Investment, Build Your Reputation

No matter how spotless your grout restoration looks on Day One, ongoing maintenance is what keeps it that way. As a pro, you’re not just cleaning, you’re setting clients up for long-term success.

A few simple habits can dramatically extend the life of a clean-and-seal job, prevent premature staining, and reduce the need for emergency calls.

Pro Tip: Deliver these tips in a branded post-clean checklist or leave-behind card, clients love having expert guidance they can follow.

Quick Habits That Go a Long Way:

      • Use a daily shower spray: Recommend a mild, tile-safe daily spray to prevent mildew and soap scum from taking hold. This is especially important in high-humidity bathrooms and poorly ventilated showers.
      • Wipe down tiled surfaces regularly: A simple microfiber cloth can keep moisture and debris from settling into grout lines. Encourage clients to wipe after cooking or bathing, just a few seconds a day adds up.
      • Spot clean spills immediately: Especially in kitchens, grout is vulnerable to grease, tomato sauce, wine, and coffee. Fast action prevents permanent staining and etching.
      • Sweep or vacuum before mopping: Loose debris pushed around by mops often ends up embedded in grout. Dry cleaning methods first ensure grout lines stay cleaner, longer.

Bonus: Offer a Grout Maintenance Program

Educate your clients that sealed grout isn’t “set it and forget it.” Offer them a recurring maintenance plan where you:

      • Perform a light refresher clean
      • Touch up problem spots
      • Reapply sealer as needed

Schedule this service every 3–6 months for high-traffic areas, or annually for residential clients. Not only does this help your clients maintain their space, it builds loyalty, repeat business, and predictable income for your company.

Make Grout Your Signature Detail

Cleaning grout might not be glamorous, but it’s one of those little details that separates good cleaners from great ones. Clients notice when their tile looks brand new. By mastering grout restoration, and packaging it with preventative care, you’ll build trust, boost referrals, and justify premium pricing.

When grout lines look clean, the whole space shines. And when you educate clients, protect your results with sealing, and offer ongoing care, you position yourself not just as a cleaner, but as a trusted maintenance partner they’ll return to again and again.

Our curated cleaning kit for professionals

We’ve curated a cleaning kit of our top products that our professional cleaning customers purchase over and over again. It contains three full days’ worth of high quality supplies for one cleaner, including four types of microfiber towels, microfiber dusters, scrubbers, heavy duty mops, and a laundry bag.

All this would usually cost you $500. Get it for $299.

Preguntas frecuentes

Most common questions about cleaning tile grout.

What is the best homemade solution for cleaning grout?

A popular DIY grout cleaner is a paste made from baking soda and hydrogen peroxide. It lifts stains, deodorizes, and whitens without harsh chemicals. Apply it to the grout lines, let it sit for 10–15 minutes, then scrub with a stiff brush. Avoid vinegar on unsealed grout, it can erode it over time.

How do I get grout white again without damaging it?

To safely whiten grout, use oxygen bleach, a steam cleaner, or a grout pen after deep cleaning. Avoid chlorine bleach, it can break down grout over time. Gentle scrubbing with a pH-neutral or alkaline cleaner, followed by sealing, restores brightness without risk of damage.

Is steam cleaning grout effective, and can I do it myself?

Yes! Steam cleaning is highly effective for deep grout cleaning, especially in showers and high-traffic floors. It uses heat and pressure to lift dirt, mold, and mildew, no chemicals needed. Most home steam cleaners with a grout nozzle work well, just go slow and let the steam do the work.

How often should grout be cleaned and sealed?

Grout should be spot cleaned weekly and deep cleaned every 3–6 months, depending on foot traffic and moisture levels. Sealing should be done once a year for most homes, or every 6 months in wet areas like showers. Sealing helps prevent staining and makes cleaning easier.

Can I paint or recolor my grout instead of replacing it?

Not if properly cared for. With 300+ wash durability, these towels stay soft and effective for the long haul, just avoid heat, bleach, and fabric softeners when washing.Absolutely. If your grout is stained but still intact, a grout colorant or pen is a fast, cost-effective way to refresh it. These products come in multiple colors and offer a uniform, like-new finish. Just clean the grout thoroughly first and apply carefully with a steady hand.

Deep Clean Hard Floors, Effortlessly.


  • Featured Articles

    How to Deep-Clean and Maintain Every Type of Cooktop: Glass, Stainless, Gas & More
    Speed Cleaning vs Deep Cleaning: How Professionals Know Which Method to Use (and When)
    30 Little Details That Instantly Make a Space Feel Professionally Cleaned
    Continue To Cart Continue To Customize

    By continuing with your order, you acknowledge and agree to the following:

    Our property-marked towels are printed with a repeating pattern, and logo placement may vary from towel to towel.

    You’ve chosen between receiving an emailed digital proof for a detailed review of your design at an additional cost of $20, or allowing our print team to use your uploaded file to prepare your order for printing.

    We do not accept returns for printed property marked towels.