BULK PRICING DEALS

15% OFF

15% OFF THE LOWEST LISTED PRICE
Ir al contenido
How to Clean Tile and Grout The Right Way

How to Clean Tile and Grout The Right Way

Disclosure: This post may contain affiliate links.

Shower tiles might hog the limelight due to our preoccupation with all their scrubbing needs, but floor tiles and grout remain largely overlooked.

Sadly, this lack of focus has created the widely accepted myth that tile floors inevitably get gross over time and annual deep scourings are a drudgery we should all just accept as normal.

But here's a revelation: with proper care, your bathroom floors should never reach a point where they demand exhaustive restoration.

As we’ll explain, with the right preventative measures and mopping tools, you can stop the problem before it starts, never allowing dirt and grime to build up to the point of discoloration.

That’s why the main goal of this lesson is twofold: to teach you what you expected to find, which is the tricks to restore disgusting bathroom floors, and far more crucially, reveal to you the right maintenance and preventative measures that stop the problems before they start.

If you only pay attention to the restoration part, you’ll be doing yourself a huge disservice. We promise if you follow our preventative and maintenance tips, you’ll never have to worry about restoring your floors again.

Getting to Know Your Tile and Grout

Tiles and grout are the true bathroom dream team, creating a beautiful, durable surface that can withstand the wear and tear of heavy traffic and high moisture, which is no easy feat.

To properly appreciate and clean your floors, you need to understand some of the fundamentals about them, so let's delve into the most popular types.

Tiles

Although the term tile is used a general phrase, there are actually a wide variety of tiles. Let's look into each one in more detail.

Natural Stone

A luxury choice, natural stone tiles, such as marble or granite, are stunning with unique patterns, deep shine, and a pleasant cool-to-the-touch feel. The challenge is stone can be porous and susceptible to staining and dulling.

Acid-sensitive stones

Marble, travertine, and to a lesser degree, granite add an extra layer of trouble to the natural stones challenge list.

They can be dissolved by traditional acid-based bathroom cleaners, some hair care products, and even tart beverages.

This is especially problematic in areas with hard water, as it drastically limits the products you can use to fight hard water, which is most easily removed with acid, leaving you only with abrasives, detergents, and elbow grease.

Ceramic

Made from clay and then kiln-fired, ceramic tiles are durable, water-resistant, and relatively easy to maintain, making them a favorite for many homeowners.

The challenge for ceramics is not only their limited and dated appearance but they can also be slippery and prone to cracking if not perfectly installed. Also, most popular ceramic tiles tend to be smaller in size, so they create even more grout to maintain.

Porcelain

A type of ceramic tile that's fired at higher temperatures, porcelain is denser, less porous, and more water-resistant than standard ceramic.

Its durability makes it ideal for high-traffic areas. Again, like regular ceramic, it can tend to be dated in appearance and small, thus increasing grout to maintain.

Also, the lack of porousness and improved water resistance actually drives more dirt into the grout lines even faster.

Mirror Tile

Known for their glossy finish and the ability to reflect light, mirror tiles can make spaces appear brighter and larger.

They're stain-resistant but can be more slippery and fragile than other tile types. Their slippery, fragile nature usually makes them too high a risk to cover a full bathroom floor, but they may be used as accents, especially in mosaics.

Terracotta

Made from red clay, terracotta tiles offer a warm, earthy appearance.

Their association with quick serve foodservice nearly doomed them for a while popularity-wise, but different tile cuts and styling have helped them make a comeback.

They're the most porous clay tile option, making sealing essential to protect them from stains and moisture.

Vinyl Tile

A popular choice for its affordability and durability, vinyl tiles offer the appearance of natural materials like stone without the associated cost. They're water-resistant, easy to install, and lack grout lines to maintain.

Unfortunately, vinyl tiles are notorious for not sticking well and allowing gaps between tiles that can allow moisture to seep through to the subfloor, so they are not an ideal long-term bathroom flooring solution.

Sheet vinyl avoids some of the concerns but can be less aesthetically pleasing than the real tile floors it is mimicking.

Properly identifying what type of tile you have or want to install is crucial, as it directly impacts the care routine and potential issues you might face, as well as the cleaning chemicals you should use.

Grout Options

Did you know that the ancient Romans used grout to make their mosaic art?

They would make a mortar base and then arrange glass, stones, pottery, and seashells as close to each other as possible and fill out the spaces with grout. The stunning creations were then cleaned and polished.

Grout has evolved significantly since this era. Let's dive into the grout of our modern times:

Colored Grout

This grout type is infused with pigment, enabling homeowners to match or contrast their tiles. However, its color might fade with harsh cleaning agents.

Also, if the grout is too light in color, it can make the dirtier spots even more obvious, but if it is too dark, it can hide poor maintenance till the floors are absolutely unsanitary, so there is no clear winner.

Acrylic-mixed Grout

Durable and less porous than traditional options, this grout has acrylic compounds, making it resistant to moisture and stains.

The challenge with this option is that it takes far more product and time for the grout to be installed, so this tends to increase the cost of the floor selected dramatically.

Epoxy Grout

Among the most durable grouts available, epoxy grout is made from resin and filler powder, making it highly resistant to stains and chemicals. It's ideal for areas with heavy moisture, such as showers.

Sanded vs. Unsanded Grout

Sanded grout contains fine sand and is used for wider grout joints, providing added strength. In contrast, unsanded grout is smoother and used for narrower joints, often seen between wall tiles.

Your choice of tile and grout will often come down to:

  • Aesthetics
  • Budget
  • Maintenance preference

Each has its merits and challenges, but with the right care, any choice can shine for years.

I am just a homeowner who appreciates tools that make house cleaning easier. This mop worked just like what you see on the videos. For me doing the bathroom floors with the flexible mop just works better. - David, New London, United States

An Ounce of Prevention is Worth A Pound of Scrub

Out of a very valid fear that you’ll just focus on restoring dirty tile floors and forget to read the rest about how to stop the problem from happening again, I’m intentionally putting the cart before the horse.

You can skip down to the grout stain-removing tricks if you insist, but trust this professional when I tell you THIS is the most important section in this article.

Here's a hard pill to swallow: when you mop, even if you do it perfectly, if your grout is not sealed, you’ll always finish mopping with your grout dirtier, not cleaner. The reason for this conundrum is gravity and chemistry.

The detergent in floor soap bonds with the dirt, lifting it up from the tile and grout into the water. As you mop, you’re supposed to absorb all the dirt-filled water, but most people rarely do, especially if they have a subpar mop.

This means all the loosened dirt just sits in the residue water till it dries, sinking and resettling into the lowest point of gravity: grout lines.

Now, imagine a protective shield that prevents dirt from sinking deep into your grout lines and tile textures. That’s precisely what sealants achieve. By forming a barrier, sealants ensure that grime remains surface-level, easily wiped away.

Sealants drastically improve your mopping performance even with the most outdated mop, but with a premium microfiber mop, you can easily capture virtually all residue and loosened soils, keeping your grout looking like new for years.

What's the Catch?

But there's a catch. For sealing to be safe, the grout and tile, especially if porous like natural stone, must be bone dry and fully cured.

This drying phase is crucial, as sealing in moisture can lead stone and grout to damage and rot, ruining the very floor you’re trying to preserve.

Proper drying can take up to three days post-installation, a time by which most contractors are long gone to the next lucrative gig. This is why most contractors won’t push or even mention sealing to their customers, so you have to be an insider in the know to realize and ask for this critical last step.

If you're reading this with tiles long past their installation window, fret not. A restorative deep clean can return them to their pristine state that you can lock in properly this time. Once clean and thoroughly dry (again, that crucial three-day wait applies to the deep clean, too), they're ready for sealing.

Although you can tackle this as a DIY project, expertise matters. If unsure, consider hiring a professional tile restoration and sealing company.

For those whose budget or love of tinkering is driving them to DIY, here are the fundamentals, but be sure to read the specific instructions of the sealant you select:

  1. First, choose a sealant designed to be applied to both tile and grout (our favorite pick 511 Impregnator Sealer.) This saves you the tedious task of painting grout lines separately. Sealants are typically applied using a manufacturer-specific applicator or a low-nap paint roller.

  2. After you apply the sealant, let it sit briefly to absorb, then wipe away any excess using a lint-free cloth, such as a disposable microfiber towel (sealants are near impossible to wash out).

  3. Once applied, avoid walking in the area for several hours, and be aware that it might take days to fully cure.

The longevity of your sealant is influenced by foot traffic, cleaning frequency, and the harshness of your cleaning products.

A telltale sign that re-sealing is due? Water on the floor stops forming beads, creating small puddles instead.

As the sealant wears off, even more water can start absorbing into the grout and tile again, which is a red flag that your floors are no longer safe from damage and dirt.

MWipes™ Toallitas reutilizables de microfibra para limpieza 

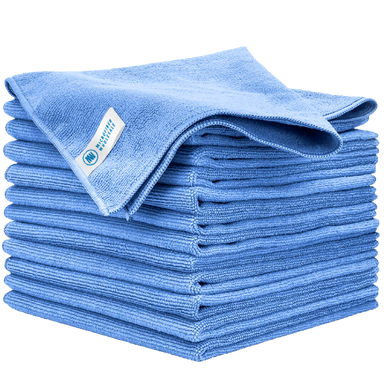
High-quality microfiber that’s good enough to reuse but cheap enough to throw away if you’re cleaning something that won’t launder out safely. Check price

511 Impregnator Sealer*

A DIY-friendly water-based sealer that’s as simple as apply, wait five minutes, wipe up, and let dry. Safe on most tile and grout and last for years with normal usage. Best of all, it’s invisible, so it doesn’t change the look of your tile or grout.

Miracle Sealant Applicator

Make your sealing project idiot-proof with a quick and easy applicator. Just dip and spread for quick, even coverage.

*Warning: Always consult your installer before applying permanent sealants to porous stone or grout. At a minimum, read the instructions carefully and ensure the stone and grout are fully clean and bone dry before you trap them in dirt, oil, or moisture with a sealant.

Transform Your Tile: Give Your Floor a Glow up

Restoring neglected tile floors and bringing back the original brightness of stained grout might seem like a Herculean task. But with the right tools and techniques, you can renew their look without spending endless hours on your knees scrubbing.

Let's dive into some efficient methods to rejuvenate your tile flooring and grout.

Chemical Aid with Acid Brighteners

If you're dealing with acid-resistant flooring, such as porcelain or ceramic and wish to minimize manual labor, acid brighteners are your go-to. Products such as Zep Grout Cleaner & Brightener have garnered industry recognition for their potent stain-removing properties.

But with great power comes great responsibility.

These commercial-grade products can pose hazards, including chemical burns or damage to acid-sensitive surfaces such as marble. Therefore, if you decide to use them, ensure you're equipped with protective goggles and gloves and you thoroughly peruse the instructions.

A word of caution: avoid combining acid treatments with electric spin tools, as inadvertent splattering could have hazardous outcomes.

If you are working with an acid-sensitive floor, such as marble or granite, acid brighteners are out of the question.

In this case, you need specialty cleaners such as Black Diamond Intensive Stone & Tile Cleaner designed with strong detergents to replicate the acid-brightening results without damage.

They are a little slower to work than their acidic counterparts, but still very effective and far safer, so they can honestly be a great solution for any floor if you're nervous about working with acids.

Control Odor with Urine Remover

Let’s say the quiet part out loud: bad aim is one of the toughest challenges when it comes to keeping bathroom floors looking and smelling beautiful. And little kids aren’t the only ones to blame.

As this is a skill that can clearly take decades or even lifetimes to master, savvy cleaners need a systemic solution.

Professional Urine Removers truly get to the root of the problem, dissolving the urine crystals that cause persistent discoloration and killing the germs causing the odor with hydrogen peroxide and enzymes.

Electric Scrubbing Hand Tools

An electric scrubbing hand tool, like the Drill Brush, can make a huge difference.

Attach this tool to your existing electric drill and let it work its magic, especially on bathroom showers and small floors.

When paired with an effective bathroom or floor cleaner, you can witness dirt and grime being effortlessly whisked away. It's a lightweight, cost-effective option suitable for smaller areas.

Mechanical Assistance with Orbital Scrub Brushes

For those with large bathrooms or tiles that cannot be exposed to acid treatments, consider using an orbital scrub brush.

These devices operate at high speeds (around 175 rpm) and do most of the hard work for you. Weighing under 25 lbs, they are easy to handle and maneuver.

If purchasing seems a tad overboard, many local hardware outlets offer them on rent. Alternatively, consider renting heftier floor scrubbers; however, these can weigh upwards of 90 lbs and might pose challenges in transportation.

Whichever you opt for, use a neutral pH deep cleaner like Black Diamond Stonework & Tile Intensive cleaner for optimal results.

The Power of Steam

For those seeking an environmentally friendly approach without compromising effectiveness, steam cleaners are an ideal option.

Especially beneficial when looking to restore vast stretches of grout, these machines eliminate the need for harsh chemicals.

Although effective, they require caution in their operation. It's worth noting that while they can be rented affordably from big hardware stores, mishandling can lead to burns.

However, when used correctly, they can rapidly remove dirt from grout and are generally lighter than their mechanical counterparts – a significant advantage if portability is a concern.
The Drill Brush

Turn your cordless drill into a scouring tool that does the scrubbing for you.

Oreck Orbiter Machine

If you have a lot of grout floors to restore and can’t use acid or steam, orbiters are a classic that is lightweight and scour floors effortlessly and effectively.

Black Diamond Intensive Stone & Tile Cleaner

When cleaning acid-sensitive stones like marble and travertine, Granite Gold brings great performance without damage. While not as powerful as a traditional bathroom cleaner, for an acid-free bathroom cleaner, its results are very impressive.

Zep Grout Cleaner & Brightener

Acid is the go-to for commercial contractors to brighten grout between durable tiles. It’s fast, effective, and requires minimal agitation. Just be sure to wear all the right safety equipment and keep it off delicate surfaces like paint, stone, and yourself.

Mastering Maintenance with Microfiber

Once you've deep-cleaned your tile floors and sealed in the restored perfection, it's time to let out a sigh of relief. Maintenance now becomes a breeze, so long as you get the right mop and floor soap to keep you from undoing all your hard work.

With your grout safeguarded from the evils of deep-set stains, you're essentially just dealing with surface-level mischief. Since the dirt should easily slide off the surface, it makes sticking to a weekly mopping routine far less daunting.

Plus, by frequently mopping, you're keeping yourself from having to use aggressive chemicals and scrubbing, ensuring your sealant lasts as long as possible.

Abrasive and acidic bathroom cleaners can wear off sealants, so be careful about splashing them from inside your shower and tub onto your floor.

The Magic of the Mucho Mop

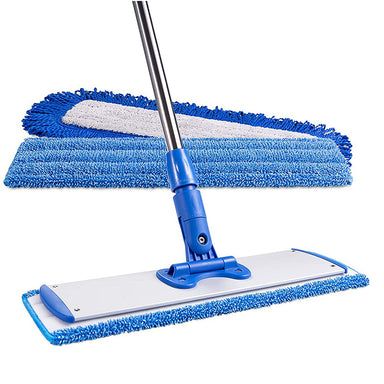
If you truly want to keep your newly restored floor looking its best and make it as easy as possible to maintain, you need to upgrade to a Mucho Mop.

The Mucho Mop is made of 100% microfiber chenille fingers that dig deep, scrubbing and absorbing dirt in grout lines and textures that most mops can’t reach.

The mop pad fits on any standard 18” or 10” frame (and can even fit on your old Swiffer Wet Jet) and can last for 300+ washes, ensuring your tile floor stays beautiful for years to come.

While the Mucho Mop is effective enough to clean with just water, thanks to the power of microfiber, in bathrooms, most people prefer the fragrance and extra insurance of a good floor soap.

When it comes to choosing a floor cleaner for maintenance cleaning, Mr. Clean or Fabuloso are the true jacks of all trades.

They’re both neutral pH and loaded with detergent and fragrance, ensuring any floor, be it marble or mirror, shines bright and smells great without a streak in sight.

I use these for wet mopping and I'm very pleased with the results, no matter what the hard surface may be. They are much easier to wring out that other mop heads, I just wish I would have found these 20 years ago when we started our business. Bottom line, I highly recommend these. - Mike, Minneapolis, United States

For maintaining bathroom tile floors, microfiber dust mops are non-negotiable essentials. Here's why:

  • These mops excel in capturing hair strands and beard trimmings, ensuring your floor remains speck-free
  • They effectively removing more dirt and debris paving the way for a smoother mopping experience
  • Unlike traditional brooms that might be rubbing in dried pee and fecal residue and never get cleaned (gross, right?), microfiber dust mops can be tossed directly into your washer and dryer

High-quality microfiber can be fully sanitized by spending 1 hour at 135º in the dryer (medium/permanent press setting).

This means every time you use a microfiber wet mop or dust mop, you're starting with a freshly sanitized tool, ensuring your bathroom remains a true oasis of cleanliness.

Step-by-Step: Sweep, Mop, and Maintain

Contrary to popular belief, there's more to cleaning than merely running a mop over a floor or sweeping off dust.

1 - Broomless Sweeping (The Pro’s Secret for Deeper Cleaning)

  • Start by decluttering: Remove items like bath mats and waste baskets to clear the floor.

  • Select a broomlesss sweeper: Choose a Dust Mop or Vacuum with Floor Brush Attachment. Brooms kick dust in the air, but microfiber dust mops and vacuums trap and remove dirt, reducing mopping work.

    Dust mops are ideal for bathrooms because they can be laundered. If you use a vacuum brush, be sure to clean it with disinfectant so you don’t spread toilet germs.

  • Work your way from inside out: If you are vacuuming, plug it in either at the room's entrance or just outside in the corridor. Then, with the duster or vacuum, work from the back to the door to avoid tripping on cords or stepping on your work.

  • Always edge first: As you work around the room from back to front, vacuum or dust the edge of each section before cleaning the center.

  • Eight is great: If using a dust mop, work the mop in a figure 8 pattern to cover more area and keep from pushing dust into the edges and corners.

2 - Microfiber Mop Magic Part One: Bucket Technique (for Robust Floors)

  • Prepare your bucket: Combine hot water and floor cleaner as per the manufacturer’s guidelines. For extra dirty floors, fill a second rinse bucket filled with plain hot water.

  • Work your way from inside out: Start mopping from the room's deepest point, advancing towards the entrance to minimize treading on wet surfaces.

  • Always edge first: Address the floor in 3’ x 3’ sections. Start with the edges, followed by the center. Check the mop pad frequently to determine when it is full.

  • Eight is great: Aim for the figure 8 mopping pattern to effectively collect and push debris and you wet clean. If the space is too cramped, resort to a back-and-forth motion but keep an eye out for stray debris.

  • Watch, rinse, repeat: Regularly inspect your mop head for accumulated dirt. Rinse the mop pad in the bucket as needed (use a rinse bucket for heavy soiled floors). Replace mop water or rinse water when it has gotten too contaminated.

  • Protect against puddles: Monitor for any puddles, ensuring the floor remains slightly damp and not soaked. Keep a sharp eye out for puddles sloshing out of your buckets and sop them up quickly.

3 - Microfiber Mop Magic Part Two: Spray Mopping Technique (for Sensitive Floors)

  • Prepare your spray: In a quart-sized spray bottle, mix water and floor cleaner as indicated by the manufacturer.

  • Chin for the win: Ensure your mop pole's height aligns with your chin for an ergonomic stance.

  • Moisten the mop: Wet and wring out the head with clean water, ensuring it's damp, not saturated. If you're far from a sink, pre-dampen a few mop heads at once and store them in a plastic bag.

  • Back to front: Begin at the back of the room, moving towards the entrance.

  • Spray away: For each 3’ x 3’ section, spray the cleaning solution directly onto the floor, ensuring the nozzle is set to a jet stream. Then mop the section, starting with the edges.

  • Always edge first: As you Work around the room from back to front, mop the edge of each section before cleaning the center.

  • Wash in a figure eight pattern: Work the mop in a figure 8 pattern to cover more area and keep from pushing dust into the edges and corners. If clutter and furniture disrupts this, opt for a back-and-forth motion but watch for abandoned debris.

  • Watch, rinse, repeat: Regularly inspect your mop head for accumulated dirt. Replace or rinse as required.

  • Protect against puddles: Monitor for any puddles, ensuring the floor remains slightly damp and not soaked.


10” Mucho Mini or 18" Mucho Mop Kit

The chenille fingers of the Mucho mop dig deep to flick out and absorb dirt other mops miss. Keep your grout clean effortlessly with a mop designed to keep dirt in the crevices from building up. Check price

Mr. Clean Multipurpose

Mr. Clean has been one of the most popular floor cleaners for generations because it is one of the safest and most reliably effective. It’s neutral pH, so you can use it on any washable floor, and it rinses dirt and grime quickly.

Fabuloso

Fabuloso is the number 1 daily surface cleaner in Mexico and has also taken the US by storm thanks to its unbeatable combination of high fragrance and performance at a low price. It’s neutral pH and leaves a great shine and lasting scent.

Time to Turn Your Tile from Terrible to Terrific

As we wrap up this deep dive on tile floor care, it's evident that the difference between a decent looking bathroom floor and a stunning one lies not in the effort, but the knowledge.

In bathroom cleaning, when you learn to work smarter, not harder, it shows. Now armed with the knowledge you've gleaned from my years of industry expertise and research, you're now prepared to make every inch of your floors gleam with the pristine shine of SCIENCE, not elbow grease.

But everything you just learned is not just for aesthetics; it's really about protecting your energy and your investments. By using these new techniques, you're not only achieving an impeccable clean but also ensuring that maintaining this standard becomes more and more effortless over time.

The value of expert advice is clear: with every sweep, mop, and vacuum, you're not just cleaning—you're preserving the beauty of your surfaces, and your precious time that can be spent on enjoying your home, not just scrubbing it.

But the magic of a home doesn't stop at bathroom floors.

We have so many rooms left to transform before the month is over. Don't miss out on our next session on Thursday 8/24 titled "Living Area Lift: Pro Tips to Refresh Bedrooms, Living Rooms, and More!"

Elevate every nook and cranny of your or your client’s living spaces, all while putting in less effort, not more, with advice straight from the expert. See you then.

Our best selling towels in 48 packs

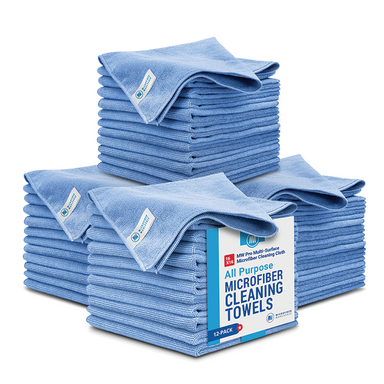
Our MW Pro Multi Surface Microfiber Towels are the holy grail of cleaning tools. Professionals don't clean without them, and they're a must-have in every cleaning arsenal. Buy bulk and save big!

The 12"x12" is the perfect compact size for tackling smaller surfaces and items, like ornaments and bookshelves.

The 16"x16" allow you to clean larger areas like countertops and windows quickly without needing to replace towels frequently.

Preguntas frecuentes

Encuentre respuestas a nuestras preguntas más frecuentes.

Vídeos sobre cómo hacerlo

Vea cómo utilizar su microfibra de forma eficiente y eficaz.

Artículos

Artículos y consejos técnicos sobre el mejor uso y cuidado de su microfibra.

Entrevistas

Aprenda las mejores técnicas de limpieza de microfibras de la mano de profesionales expertos.

Continue To Cart Continue To Customize

By continuing with your order, you acknowledge and agree to the following:

Our property-marked towels are printed with a repeating pattern, and logo placement may vary from towel to towel.

You’ve chosen between receiving an emailed digital proof for a detailed review of your design at an additional cost of $20, or allowing our print team to use your uploaded file to prepare your order for printing.

We do not accept returns for printed property marked towels.