Ir al contenido

Your Cart

Add More. Save More. Ship Free.

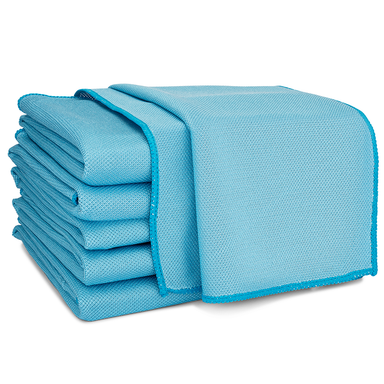
Pack de microfibra para limpieza de cristales

$16.98

5x7 Microfiber Lens & Glass Cleaning Cloth - 2 Pack With Case

$7.98
Seleccione el color: Paisley

10" Microfiber Scrubber Mop

$13.98

Toalla de microfibra Buff™ Detail 400 GSM (Gramos por metro cuadrado) de 16"x 16".

$19.98
Seleccione el color: Gris
A hand holding a blue cloth cleaning a shower.

How to Clean Showers Like a Pro

Whether you're a tenant, homeowner, or cleaning pro, we can all agree that cleaning the shower is one of the most tedious and time-consuming chores. Still, regular deep cleaning is essential to maintain bathroom hygiene.

Let’s face it, shower cleaning tends to fall to the bottom of the to-do list. But for the sake of health and appearance, it’s a job that can’t be ignored.

Learn exactly how to clean a shower, from identifying grime to picking the right products. By the end, you’ll know the most effective way to tackle this task.

Top 3 Essential Products for Cleaning Showers

Best For Removing Hard Water Stain Build-Up From Glass & Tile Surfaces

Best For Removing Mildew & Mold From Grout & Shower Glass Doors

Best For Preventing Soap Scum and Hard Water Stains on Glass & Tile

Most Common Shower Stains and How to Identify Them

Before you reach for a cleaner, it’s crucial to know what you’re dealing with. The most effective way to clean a shower starts with identifying the most common types of stains, because each one requires a different approach.

Using the wrong products can make stains worse or even damage your shower surfaces. That’s why understanding the source of buildup is the first step to efficient, low-effort cleaning.

Here are the top three types of stains you’ll typically find in a shower:

Hard Water Stains

Hard water is usually chalky white calcium and magnesium deposits on shower glass. And tub rings, often in the shape of dried water droplets and drip patterns.

Red or green rust stains are also part of the hard water family. The iron that causes these stains is another chemical common in hard water.

Mildew and Mold

These black, pink, or greenish patches thrive in humid environments and are common in grout lines, corners, and caulking. They can cause unpleasant odors and potential health concerns.

Fun fact, the scientific names for each type of mold found in your bathroom are called:

  • Black: Stachybotrys chartarum
  • Green: Aspergillus
  • Tan: Talaromycosis
  • Brownish gray: Cladosporium
  • Pink: Serratia Marcescens

It grows where moisture lingers longest in the shower, such as in unsealed grout lines that absorb water.

In some cases, you can find mold on window sills that are exposed to the shower water. Knowing how to clean a shower affected by mold and mildew is essential for a healthy bathroom environment.

Soap Scum

This filmy residue is a mix of soap, body oils, and minerals. It clings to glass doors, tiles, and tubs, creating a dull, cloudy surface that’s tough to remove without the right tools.

Knowing which stains you're up against will help you choose the proper shower cleaning products and methods, saving you time, effort, and unnecessary frustration.

"When using the glass cleaning cloths along with regular microfiber cloths and water, the windows and mirror turn out beautiful and there's no chemical smells." - Lisa Hall, United States

Modern bathroom with a glass shower, green tile, and neutral decor.

Choose the Best Shower Cleaning Products for Stubborn Grime

Once you've identified the type of grime you're dealing with, the next step is selecting the best shower cleaning products tailored to each specific stain. Whether you're battling hard water deposits, mold in shower grout, or tough soap scum, using the right solution makes all the difference, and prevents unnecessary damage or effort.

Hard Water Stain Removers

Hard water stains form when minerals like calcium, magnesium, and iron build up on shower doors, tiles, and fixtures. These chalky white spots are best removed using acidic solutions that safely dissolve mineral residue.

Mild acids are key. For everyday use, stick with safer acids like:

    • Acetic acid (white vinegar) – effective, affordable, and eco-friendly.

    • Oxalic acid (Bar Keepers Friend) – ideal for more stubborn deposits.

    • Citric acid-based sprays – gentle on surfaces and tough on mineral buildup.

Pro Tip: Avoid harsh commercial acid cleaners that can etch glass or damage natural stone. Stick with pH-balanced options labeled safe for bathroom surfaces.

Using these products consistently is one of the best ways to remove hard water stains from shower doors and tiles, without relying on heavy scrubbing.

Mold and Mildew Cleaners for Shower Grout

Mildew and mold thrive in damp, poorly ventilated showers, especially within grout lines and silicone seams. While they can be bleached for temporary results, real mold removal requires an oxidizing agent—and in some cases, deeper intervention.

Effective natural oxidizers include:

    • Hydrogen peroxide – gently whitens grout without toxic fumes.

    • White vinegar and baking soda – a powerful combo that cleans and deodorizes.

    • Oxygen bleach products – safer than chlorine bleach, great for persistent mold.

Important: Mold embedded deep in grout will keep returning unless you remove the source of moisture. Re-sealing grout or replacing caulk may be necessary for long-term control.

Best Way to Clean Soap Scum in the Shower

Soap scum is a sticky mix of hard water, soap, skin oils, and body products that clings to glass, tile, and tubs. It often resists basic cleaners, making it a top complaint in shower maintenance.

To tackle soap scum effectively, you’ll need a combo approach:

  • Detergents – like dish soap or all-purpose degreasers – break down oils and surfactants.

  • Gentle acids – citric or oxalic acid dissolves mineral content and lifts residue.

  • Disinfectants – clean and sanitize while boosting the effectiveness of your solution.

Pro Tip: Avoid cleaning soap scum with acid alone. Without a degreasing agent, the oils and residue won’t lift, leading to streaks and frustration.

Look for shower cleaners labeled for soap scum and hard water, or make your own DIY mixture using vinegar, dish soap, and a sprinkle of baking soda.

Master the Two-Stage Scrubbing Method for Deep Shower Cleaning

When learning how to clean a shower like a professional, the Two-Stage Scrubbing Process stands out as one of the most effective and energy-efficient techniques. It delivers a deep clean without harsh scrubbing, making it ideal for regular maintenance and deep cleaning alike.

This method works for a variety of surfaces, including ceramic tile, porcelain, fiberglass, and natural stone, as long as you match the right tools and cleaners to the job.

Here’s a step-by-step breakdown of how to clean your shower using this proven technique:

Step 1: Identify Your Shower Surface

Before applying any product, assess what your shower is made of. This determines what kind of cleaner and tools are safe to use.

  • For delicate surfaces like marble, travertine, fiberglass, ceramic, and porcelain, avoid acidic or abrasive cleaners such as vinegar, citric acid, or scouring powders.

  • Instead, opt for pH-neutral or specially formulated shower tile cleaners that protect finishes while removing grime.

Knowing your surface type is crucial for avoiding damage and getting optimal results.

Step 2: Apply the Right Shower Cleaner

Apply your chosen shower cleaning solution generously and let it dwell for at least 10 minutes (or as directed on the label). This soak time allows the active ingredients to:

  • Break down soap scum buildup

  • Dissolve hard water minerals

  • Whiten and lift mold and mildew from grout lines

The longer the dwell time (within reason), the less scrubbing you'll have to do later.

Step 3: First Scrub – Loosen Surface Grime

Use a soft scrubbing tool, like the non-abrasive side of a microfiber scrubbing sponge, to emulsify and lift loosened dirt, soap film, and residue from walls and fixtures.

  • Scrub in broad, overlapping circular motions to clean large areas efficiently.

  • Focus on consistent pressure rather than forceful scrubbing.

This first pass is designed to remove the "easy" layers of grime before you target the tough spots.

Step 4: Second Scrub – Target Stubborn Stains

After rinsing, identify any lingering buildup or discolored spots.

  • Reapply your cleaning solution to stubborn soap scum, calcium spots, or moldy grout.

  • Flip your microfiber sponge to the scrubbing side and focus on these areas with more pressure.


This stage is key to restoring a polished, like-new finish, without damaging your surfaces.

Step 5: Rinse and Dry to Prevent Residue

Give your shower a final rinse with clean water, then dry thoroughly with a Buff™ Microfiber Towel.

Drying is especially important in hard water areas because:

  • It prevents new mineral deposits from forming.

  • It reduces the chance of water spots or streaks on glass and tile.

  • It helps maintain a spotless shower finish between deep cleanings.

Why This Method Works

The Two-Stage Scrubbing Process is designed to clean smarter, not harder. By allowing cleaners to do most of the work and following up with strategic scrubbing, you save time, protect your shower surfaces, and get consistently better results.

Use this technique as your go-to method for:

    • Removing soap scum from shower walls

    • Cleaning fiberglass showers without scratching

    • Preventing mold growth in shower grout

    • Minimizing hard water buildup on tiles and glass

"These towels are amazing. When I first opened the package I thought, no way these are going to dry as advertised. What a pleasant surprise when I tried them. They work just as advertised. So happy to have them and have recommended them to friends." — Bonnie Benham, Verified Customer

How to Clean Shower Tile Grout the Right Way

When it comes to deep cleaning your shower, the grout between your tiles is often the most neglected (and the most stubborn) area. Over time, shower grout can become discolored, moldy, and grimy, often without you even noticing until it’s heavily stained.

But here’s the thing: grout is more porous and delicate than tile or glass. That means harsh chemicals like bleach and abrasive cleaners can actually damage it, causing erosion and long-term wear.

To get your grout clean without compromising its integrity, here’s what the pros recommend:

What Is the Best Cleaner for Shower Grout?

While DIY mixtures like baking soda and white vinegar (1:1 ratio) can be effective for light buildup, the best grout cleaner for showers, especially for mold and mildew, is hydrogen peroxide.

Why? Because:

  • It’s a powerful oxidizer that whitens grout.

  • It effectively kills mold spores and bacteria.

  • It’s non-toxic, affordable, and readily available.


Hydrogen peroxide is a go-to for professionals who want a safer alternative to bleach that still delivers powerful results.

Step-by-Step: How to Clean Shower Grout with Hydrogen Peroxide

1. Pre-rinse the grout with water

Start by using warm water and a small brush (like an old toothbrush) to scrub and loosen any surface dirt or soap residue. This clears the way for deeper cleaning.

2. Apply hydrogen peroxide directly to the grout lines

Pour or spray it on liberally, ensuring full coverage of stained or moldy areas.

3. Let it sit (if needed)

For light cleaning, you can begin scrubbing right away. For tougher spots or mold in corners, allow the hydrogen peroxide to sit for 5–10 minutes to break down the stains.

4. Scrub with a toothbrush or soft grout brush

Focus on grout lines, corners, and crevices, where mold and mildew tend to collect. Use small, circular motions for the most effective removal.

5. Rinse thoroughly with warm water

Wash away any residue and dislodged grime. Use a detachable shower head or a container of clean water.

6. Dry the grout with a Buff™ Microfiber Towel

Drying is essential to prevent mold regrowth and hard water stains. A microfiber towel absorbs moisture without scratching or leaving lint.

Bonus: How to Keep Shower Grout Cleaner for Longer

Learning how to clean grout in the shower is just the beginning. For long-term results:

    • Squeegee or dry your shower after each use to reduce moisture.

    • Use a grout sealer every 6–12 months to protect against staining.

    • Spray a daily shower cleaner or white vinegar solution to prevent buildup.

    • Keep your bathroom well-ventilated to discourage mold growth.

    • Wipe down corners and grout lines weekly with a damp microfiber towel.

How to Clean a Shower Head and Remove Hard Water Buildup

One of the most neglected areas in your bathroom cleaning routine is the shower head, but it shouldn’t be. Even though it doesn’t get as much soap scum as your tiles or glass, it’s a magnet for hard water stains, mineral deposits, and mildew that can affect water flow and hygiene.

Follow these easy steps to deep clean a shower head and restore optimal performance:

DIY Shower Head Cleaning Method

You’ll need:

    • A zip-lock or freezer bag

    • White vinegar

    • Elastic band or hair tie

    • Toothbrush or small scrub brush

    • Dish soap (optional)

Step-by-Step Instructions:

  1. Fill a bag with white vinegar and secure it around the shower head using an elastic band. Make sure the shower head is fully submerged in the vinegar.

  2. Let it soak for at least 20–30 minutes (or longer for stubborn buildup). The acetic acid in vinegar breaks down limescale and calcium deposits effectively.

  3. Remove the bag, then scrub the nozzles and crevices with a firm toothbrush to dislodge any remaining residue.

  4. If buildup remains, re-soak and add a small amount of Dawn dish soap to help dissolve grime. Scrub again, then rinse thoroughly.

  5. Finish by wiping the exterior with a wet Microfiber Cloth and polishing with a Microfiber Glass Cleaning Cloth for a gleaming finish.

Modern bathroom sink with a plant and rolled towel.

How to Clean Shower Glass and Remove Water Spots

Shower glass is one of the most visible areas of your bathroom, and the first to show signs of buildup. Water spots, soap scum, and mineral deposits can make your glass look cloudy and dirty even if the rest of your shower is clean.

Here’s the best way to clean shower glass for a clear, streak-free shine:

Step-by-Step Shower Glass Cleaning:

  1. Use a Microfiber Scrubbing Sponge with dish detergent. Scrub the surface gently using the textured side of the sponge to remove soap scum and daily grime.

  2. For stubborn hard water stains or mildew, spray white vinegar onto the glass and let it sit for 5–10 minutes.

  3. Use a scraper or razor blade (only if safe for your glass type) to carefully lift off the softened mineral buildup.

  4. Rinse thoroughly with warm water to wash away residues.

  5. Wipe the surface with a damp Microfiber Towel, then finish with a Microfiber Glass Cleaning Cloth for a streak-free shine.

Pro Tip: To prevent buildup, squeegee your shower glass after every use or wipe it down with a dry microfiber towel.

"They really help to get glass clean. Amazing for shower doors to remove spots without chemicals. Which is great for cleaning multiple bathrooms per day professionally or at home." - Heather, Winter Springs, United States

How to Clean a Plastic Shower Curtain Liner (the Easy, Effective Way)

Your plastic shower curtain liner might be one of the dirtiest things in your bathroom, and also one of the most forgotten. Over time, it collects soap scum, hard water stains, mildew, and bacteria, all of which can impact hygiene and cause unpleasant odors.

Here’s how to clean a plastic shower curtain liner safely and effectively:

Machine Wash Method

  1. Remove the shower curtain liner from the rod.

  2. Place it in the washing machine with a small load of towels (to act as scrubbers).

  3. Add regular laundry detergent plus 1 cup of white vinegar.

  4. Wash on a hot cycle to break down buildup.

  5. (Optional) Add fabric softener to help reduce static and improve rinse.

Once the cycle is complete, hang the curtain back up to air dry.

For Stubborn Stains: Hand Scrubbing Method

If stains remain after washing:

  1. Lay the curtain flat on a large surface (outdoors is ideal) so you can rinse easily.

  2. Apply dish soap or laundry detergent directly to problem areas.

  3. Use the scouring side of a Microfiber Scrubbing Sponge and scrub in circular motions.

  4. Rinse thoroughly with a hose or water bucket.

  5. Dry with a Microfiber Towel to avoid water spots.

Modern bathroom with glass shower enclosure and natural light from window.

How Often Should You Clean a Shower?

If you want to maintain a clean and hygienic shower, consistency is key. The best way to clean a shower effectively is by creating a shower cleaning schedule that includes daily, weekly, monthly, and occasional tasks.

Daily Shower Cleaning Tasks

  • Rinse the walls and floor after each use.

  • Wipe down glass and tile surfaces to prevent soap scum and hard water spots.

  • Use a squeegee or microfiber towel to remove moisture.

  • Pick up hair and rinse away body oils or residue.

These quick actions take less than 2 minutes and prevent long-term buildup.

Weekly Shower Cleaning Tasks

  • Use a gentle shower cleaner to scrub walls, floors, and fixtures.

  • Clean taps, mirrors, towel bars, and toilet paper holders.

  • Disinfect high-touch surfaces and clean grout with a soft brush.

Use this time to catch dirt before it turns into tough stains.

Monthly Shower Deep Cleaning

  • Deep-clean grout lines, shower walls, and floors.

  • Remove hard water stains and soap scum using vinegar or citric acid cleaners.

  • Replace or clean shower curtain liners and bath mats.

  • Polish glass and reseal grout if needed.

This is your opportunity for thorough maintenance and stain removal.

Occasional (every 2-3 month) Cleaning Tasks

These are as-needed items:

  • Unclog slow drains

  • Reseal grout when the old sealant wears off

  • Replace moldy caulk

  • Deep clean vent fans or tiles behind fixtures

Being proactive with these tasks ensures your shower stays fresh, functional, and mold-free.

Best Tools and Products for Shower Cleaning

Cleaning your shower efficiently doesn’t just save time, it also protects surfaces and reduces fatigue. Professional cleaners and homeowners alike rely on the right tools and products to get the job done quickly and thoroughly.

Must-Have Shower Cleaning Products:

  • White vinegar – Dissolves mineral buildup and deodorizes

  • Citric acid – Great for breaking down hard water stains

  • Baking soda – Natural abrasive to lift grime and neutralize odors

  • Dish soap – Degreases and emulsifies soap scum

Recommended Tools for Pro-Level Cleaning:

Investing in high-quality microfiber tools and non-toxic cleaners makes your routine faster, more effective, and safer for your surfaces, and the environment.

Pro Tips: How to Clean Your Shower Like a Professional

Want to get that sparkling clean shower without the elbow grease? These professional shower cleaning tips will help you work smarter, not harder, and protect your bathroom surfaces in the process.

Here’s how to clean your shower efficiently and effectively:

  • Identify the type of buildup you’re tackling, whether it’s soap scum, hard water stains, mildew, or mold.

  • Choose the right cleaning solution for the job. Avoid harsh chemicals that can damage tiles, grout, or skin. Stick with trusted shower cleaners like white vinegar, baking soda, citric acid, and hydrogen peroxide.

  • Use the Two-Stage Scrubbing Process to break down buildup without over-scrubbing, saving time and effort.

When you follow these best practices, you're applying expert-approved methods that ensure your shower stays clean longer, with less stress and mess.

Shower Cleaning Safety: Protecting Your Health and Home

When using bathroom cleaning products, it’s essential to protect yourself, your family, and your pets from chemical exposure and fumes. Even everyday cleaners can contain ingredients that irritate skin, lungs, or eyes, and pollute the environment if disposed of improperly.

Here’s how to clean your shower safely and responsibly:

1. Wear Protective Gear

Always wear:

  • Chemical-resistant gloves

  • Goggles or safety glasses

  • A mask or respirator

  • Long-sleeved clothing

  • Closed-toe shoes

This reduces direct contact with irritants and allergens commonly found in cleaners.

2. Ventilate the Area

Good airflow helps disperse fumes. Open windows and doors or use your bathroom fan to maintain safe air quality while cleaning.

3. Follow Product Instructions Carefully

Always read the label before use. Look for:

  • Proper dilution ratios

  • Application guidelines

  • Warnings about chemical mixing (e.g., never combine bleach and ammonia)

  • Disposal instructions

4. Dispose of Chemicals Properly

Never pour excess chemicals down the drain or toilet unless specified by the label. Follow local hazardous waste disposal guidelines to protect waterways and ecosystems.

5. Keep First Aid Accessible

Accidents happen. Keep a basic first aid kit nearby in case of skin irritation, accidental ingestion, or eye exposure.

How to Maintain a Clean Shower: Preventative Maintenance Tips

Preventative shower maintenance is the secret to reducing deep cleaning sessions and avoiding heavy product use. With just a few daily and weekly habits, you can stop grime and moisture buildup before it becomes a problem.

Here’s how to keep your shower clean and fresh, effortlessly:

1. Rinse Shower Tiles After Each Use

Use the handheld showerhead (if available) to rinse away soap residue, shampoo drips, and body oils before they dry on the walls.

2. Remove Excess Water from the Floor

A squeegee is your best friend here. Push standing water toward the drain to prevent mold, mildew, and hard water stains.

3. Ventilate After Every Shower

Open a window, leave the door ajar, or run the exhaust fan for at least 20 minutes post-shower to reduce humidity and prevent that “musty bathroom” smell.

4. Seal Grout Regularly

Grout is porous and prone to absorbing moisture and dirt. Check for cracks or worn areas and reapply a grout sealer every 6–12 months to maintain protection.

5. Don’t Forget the Shower Curtain

Wipe down the shower curtain or liner after use to prevent soap scum buildup. Always leave it fully extended to dry evenly and discourage mold growth.

Smarter Shower Cleaning Starts Here

The key to a pristine, long-lasting shower is a mix of consistency, care, and the right tools. From microfiber towels to professional-grade scrubbing sponges and chemical-free cleaners, make sure your cleaning arsenal is up to the task.

Our best selling towels in 48 packs

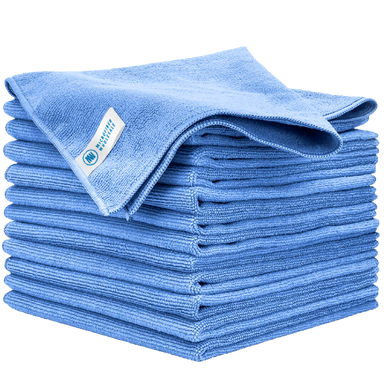
Our MW Pro Multi Surface Microfiber Towels are the holy grail of cleaning tools. Professionals don't clean without them, and they're a must-have in every cleaning arsenal. Buy bulk and save big!

The 12"x12" is the perfect compact size for tackling smaller surfaces and items, like ornaments and bookshelves.

The 16"x16" allow you to clean larger areas like countertops and windows quickly without needing to replace towels frequently.

Deep Clean Hard Floors, Effortlessly.


Productos relacionados

  • Featured Articles

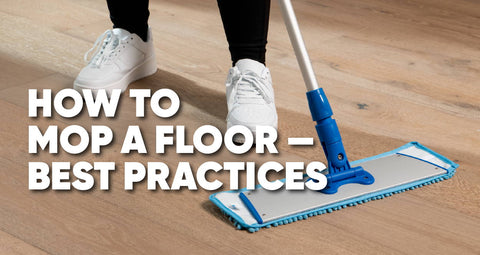
    product_16-x16-buff-pro-multi-surface-microfiber-towel-12-packproduct_professional-microfiber-mop-system-1 How to Mop a Floor — Best Practices
    product_16-x16-buff-pro-multi-surface-microfiber-towel-12-packproduct_chenille-microfiber-high-duster-2-pack 5 Tips to Make Cleaning Less of a Chore
    product_10-chenille-microfiber-mucho-mop-kitproduct_16-x16-buff-pro-multi-surface-microfiber-towel-12-packproduct_chenille-microfiber-high-duster-2-packproduct_product_18-chenille-microfiber-mucho-mop-kitproduct_professional-microfiber-mop-system-1product_ultimate-microfiber-cleaning-kit Spring Cleaning in a Box: The Ultimate Microfiber Cleaning Kit
    Continue To Cart Continue To Customize

    By continuing with your order, you acknowledge and agree to the following:

    Our property-marked towels are printed with a repeating pattern, and logo placement may vary from towel to towel.

    You’ve chosen between receiving an emailed digital proof for a detailed review of your design at an additional cost of $20, or allowing our print team to use your uploaded file to prepare your order for printing.

    We do not accept returns for printed property marked towels.