BULK PRICING DEALS

15% OFF

15% OFF THE LOWEST LISTED PRICE
Ir al contenido
How to Organize and Clean Your Garage Like a Pro

How to Organize and Clean Your Garage Like a Pro

Disclosure: This post may contain affiliate links.

No one ever intends to clutter their car space into an unusable eyesore, yet so many arrive at the same embarrassing destination, never recognizing the wrong turns they’re making until it is too late.  

If your garage has already driven over the cliff of clutter or is teetering on the edge, serendipity is on your side, as you have stumbled across the very resource you need to pull your garage back from the brink.

When trying to overhaul their garage, most people presume they should spend their time on interior design and home remodeling sites, but sadly for them, this wrong turn often leads to a dead end of beautiful yet unmaintainable makeovers.

Instead, if you want a plan to clean and organize your garage that you can actually keep up with, ask a cleaning specialist like me, Melissa Homer, a professional cleaning expert with over 20 years of experience in the commercial and residential cleaning industry. I’ll reveal the tricks of the trade professional cleaners use to restore cluttered spaces and keep them clean quickly and easily, without destroying your back or your budget.

1. Purge with Extreme Prejudice

When it comes to clutter, there are usually two main culprits responsible: sentimentality and false frugality. A capitalist society that benefits from consumers constantly buying new goods has to come up with a convincing cover story to seduce people into endlessly wasting their money on nonsense, and the answer is false frugality.

“Go ahead and buy that new coffee maker, you can keep the old one in a box in the garage as a backup!” the sirens of spending lied.  

Time and again, consumers would make the necessary updates and upgrades to their lives but then pointlessly store their outdated cast-offs under the false pretense of making good use of it again “someday." Their collections of useless crap grew!

If this sounds like you, it’s time to put on some headphones and crank up some music to drown out that siren song and dig through your piles of good intentions.

Coming to grips with the fact that you’ll never use that old coffee maker is tough, but it’s a walk in the park compared to reigning in unchecked sentimentality. “It’s so hard to say goodbye to yesterday” spent weeks on the Billboard charts for good reason, as parting with memorabilia from the past is hard for everyone, especially if they remind us of people and times we miss.

To shield ourselves from the pain of letting go, again, society stepped in with the false narrative of virtuous sentimentality. “Someday, your grandchildren will be excited to inherit Grandpa’s outdated suites and your preserved wedding dress,” the sirens lie again. Like that useless half-broken coffee pot, most things everyone keeps assuring themselves will be treasured by the next generation and will just end up clogging antique shops and landfills.

If you want your garage back, you’ll have to face the ugly truth; you’ve stored way too much useless stuff in your home that it’s overflowed into your garage.

The biggest and hardest step to reclaiming the space is purging pointless piles of stuff you’ve wasted time storing.

Cull and Sell

To get through it, treat it like ripping off a bandaid and go hard and fast, selecting a space in your home per weekend, like a closet or section of the basement, to tear apart and declutter. Free up space in closets, the basement, and the attic, so you can move the garage overflow back into the home where it belongs.

Don’t worry, some stuff can stay in your garage, but there is no chance of organizing your garage well if you don’t make some deep cuts.

Resources like Freecycle, Facebook Marketplace, GoodWill, and other local charities are great places to unload the usable items you feel guilty throwing out. Don’t get sidetracked by trying to profit off your purge unless you’re sure the item is worth a significant amount of money, and you can find a buyer easily.

Beware the trap of holding onto it till you find ”the right buyer,” as that’s how dragon hordes of clutter starts. Just consider this your chance to earn good karma by helping others. You’ll be surprised how fast things disappear when marked “Free.”

Recycle and Trash

Once you’ve dispersed every usable thing you can, it’s time to recycle and trash. Taking the time to recycle not only helps the environment but will reduce the cost of decluttering significantly, as many towns and trash service charge heavily for trash but nothing for recyclables.

Once you’re down to the actual trash, dumpster rentals or full-service trash removal services can make all the difference in finishing your project before you lose steam. Promising yourself, you’ll put out all the extra trash a few bags at a time for months is another siren’s lie, give yourself a deadline to finish your purge, or you WILL get sidetracked.

If committing to a service feels too intense, buying a dumpster bag at your local hardware store is an often overlooked great solution, as it lets you take as long as you need to fill the dumpster and schedule pick up once you’re ready. It also starts out light enough to open it right in the garage for easy filling (just don’t forget to drag it outside before it gets too heavy to move).

2. The Boxing and Labeling Bonanza

Before investing in overhead storage racks or massive steel shelving units, you need an honest estimation of how many storage tubs you need to fit on said shelves, which means boxing always comes first.

If you value your sanity long-term, try to buy as many clear storage tubs as you can afford, as cardboard boxes inevitably reduce your ability to find and utilize your items.  

Most standard shelving units are around 18” deep, 48” wide or longer, and 14” to 18” height between shelves, so finding storage boxes that max out those dimensions as much as possible will help you make the most of your shelving down the road (watch out for things like two tubs that are 23” will fit on a 48” shelf, but 25” will not).

Also, keep in mind picking a size you can realistically lift on your own onto a high shelf (for most people, that’s around 64 quarts of mixed-weight items), as the system is pointless if you can’t get things down without injuring yourself.

If you are older or have back problems, consider using smaller tubs to break up the shelves in manageable weight amounts. Even for the able-bodied, smaller tubs can be a smart move to organize smaller groups of items.

It’s OK to get a few huge bins for light bulky items, like old comforters or sports balls, but check as you load to make sure the bin isn’t too heavy. There will also be some items that you don't want to live in tubs, like hand tools, but resist the urge to start arranging peg boards for them just yet, as that comes in step five, so for now, put them in a temporary bin.

Take a little time to consider what you are packing in each tub, pairing items that get used logically together, like holiday decorations or items that help compensate for each other’s weight (like a heavy football pad combined with airy basketballs in a sports bin).

Packing tubs while you purge in step one can help clarify what should go and how much space the stuff you’re keeping is really taking up.  

Also, start to consider which tubs you’ll want frequent access to and which you’ll need occasionally and stack them in separate groups. Decide which tubs end up on the shelves by the door to the house and which end up in the back of the ceiling wrack will be much easier.

Test lift each tub often so that you don’t overload a tub and label it, only to find out you can’t move it and have to start over.

Whatever size tub you choose, don’t forget to label it and protect the label with either clear tape or label holders (future you will thank you for protecting the labels from the elements). Keep the description in short bullet points, making the list easy to scan, and title the overall grouping in large letters, so it might say “Kitchen Gadgets” as the title and “Blender, Hand mixer, Waffle Iron, Two-slice toaster” underneath.

If your penmanship is awful, even in block letters (never label in cursive, it’s too hard to read at a distance), consider typing your labels, again in simple fonts like Arial, printing as large a size as you can. Future middle-aged you will thank you for not needing their readers for every trip to the garage.

3. Clean the Cobwebs and Consider Coatings

Now that you finally got rid of all the junk and put all your remaining items in rational-sized boxes, you can finally address the dirt. At a minimum, you want to give the entire room a good vacuuming with a shop vac.

If you don't own a Shop-Vac, consider renting one from your local hardware store, as garages can be rife with wood chunks, glass shards, old nails, and lots of other things that can do serious damage to a nice residential vacuum.

If your vacuum has a hose, extension wand, and dust cup, you can also use it to address dusty window sills, cobwebs, and other neglected debris. If your vacuum can't go high, a chenille microfiber duster on an extension pole will do wonders to grab dust off all the high-reach areas in your garage.

Note: Dust before you vacuum for maximum dirt removal.

Once you've done the rough cleaning, have two directions you can go in this “Choose Your Own Adventure” story…

Option A: Dust Mop the Floor

You can just clean the garage as it is, in which case a good mopping of the bare concrete floor and washing of the walls (if it is washable paint) will make a huge improvement in the appearance of the space.

The best tool for this task is a microfiber flat mop, as you can use the traditional mop pad with the swivel lock frame (so the head doesn’t wiggle from side to side) to wash walls easier than any other mop.

For the floors, you can either use the same frame with the mucho mop pad or switch the flat frame off the pole for a tube mop, as both will navigate rough and uneven surfaces like bare concrete.

At the end of this adventure, you’ll have a lovely garage for now, but might find it hard to keep it looking that way long term, as porous unfinished surfaces are notorious for trapping dirt and being hard to clean quickly.

Option B: Resurface the Floor

I believe this is the ideal choice. Use this opportunity as a chance to resurface your garage. Traditional garages were never designed to be a cleanable and usable space as we hope to use them today.

Many garages are just bare wood walls and raw concrete, which can only be roughly cleaned, making it hard to use them for storage or hobbies without risking getting those items dirty. Resurfacing your garage, using washable paint on the walls and epoxy finish or paint on the concrete floors, transforms your garage into an easily maintainable space that can be mopped and swept like any other room in the home.

While there are many DIY paint solutions available, as a professional, it’s my job to tell you honestly when a professional is needed, and floor resurfacing is one of those occasions.

Garage floor resurfacing involves a lot of steps, including patching cracks, etching the concrete, smoothing down the finish super even, attractively spreading chips, and waiting for the correct cure times. And then sealing in the whole thing with a top coat again perfectly smooth and even, which leaves so many opportunities for you to make a streaky, globby, smeared, uneven mess versus a professional with the right equipment and practice.

At a minimum, it will take way more time and product to get the job done than a pro, as you can’t spread as evenly and thin without practice, and the coating you have access to won’t last as many years as the commercial stuff.

If you insist, I will tell you Rust-Oleum Garage Floor Kit is the most highly rated DIY, but it will take you multiple kits more and hours longer than the box promises, easily costing you $1K in kits, tools, and time, all for results you might hate and have to redo in a few years.

A garage floor refinishing service will likely cost around $2,500 but come with a guarantee of workmanship and a warranty that the surface will perform for decades.

If you have to get your DIY fix, stick to painting the walls before the floor service arrives (Kilz is a great paint for garages due to how well it resists mold and covers stains and unevenness).
Sistema de mopa de Microfibra

A heavy-duty mop frame with all metal rivets and swivel joints, plus a sturdy telescoping pole, make this hardware built to last. The unique swivel lock makes mopping walls a breeze. Premium microfiber mop pad and dry dust pad pick up dirt fast and last 300+ washes.

The Mucho Mop

 
Premium microfiber woven into plush chenille fingers allows the mucho mop to dig deep into crevices and uneven surfaces like concrete floors, HVAC vent covers, baseboards, and more.

Microfiber Tube Mop

High-quality commercial microfiber is sewn into absorbent and nimble tubes that glide over even the roughest flooring. Super absorbent to tackle even the messiest of jobs.

The Chenille Microfiber Duster

 
Premium microfiber woven into plush chenille fingers allows the chenille duster to dig deep into crevices and uneven surfaces like HVAC vent covers, baseboards, and more.

4. Install Sensible Shelving

Now that your garage is clean and resurfaced and your items are paired down and boxed, you’re finally ready for the fun part; installing organization and shelving systems.

As I mentioned earlier, most people’s instinct is to “go big or go home,” purchasing the largest overhead storage racks or massive steel shelving units they can find, but as a professional who has seen the end game of this decision, I will caution against it. You are 100% correct that you need a lot of storage, but what you really need is modular storage.

Life comes at you fast, and you have little way of knowing what your true storage needs will be as the chapters of your story unfold. Your child-free home could become filled with the patter of little feet, one of whom becomes obsessed with sports that require tons of equipment, or you can maintain your child-free ways and randomly discover the messy hobby of woodturning.

Overcommitting to large storage systems locks you into your current needs, often requiring throwing out pieces or buying a whole new system to accommodate your changes in lifestyle.

Smaller modular units allow you to rearrange, add on, and subtract from your system with minimal labor and waste. Shelving units on casters, ideally 4’ wide, 6’ to 7’ tall, and at least 18” deep, will allow you maximum flexibility.

Plastic units, while they don’t come with casters, are also very malleable and can even be turned into a workshop table if stacked half-height. You can even temporarily link units together with dryer vent clips, so you get the stability of the large shelving units without the commitment.

The best part of all these modular units is they are easily rolled out of the way for vacuuming and mopping, so the floor underneath doesn’t become a graveyard of blown-in leaves and lost screws.

Once you’ve found units you like, take the time to do a little math and figure out how many shelf units you need to store your tubs. Don’t forget to leave room for a pegboard to organize any repair tools, landscaping, or crafting items you want ready access to. Focus on boards with the greatest flexibility in design.

Overhead storage racks are awesome if you have the space, but remember they require a ladder to access, so they are only good for medium to lightweight, very rarely used items (at which point they probably should have been donated in step one).

Once the shelves are assembled comes the most important task, which is thoughtfully deciding which tubs go where. There are many to consider, but here are some of the minimums:

      1. Heavy items should be placed below chest height

      2. Most frequently used items should be placed near the room entry at eye level

      3. Infrequently use light items go on upper shelves

      4. Everything on the ground level should be stored in a sealed tub (in case of flooding)

      5. Keep like items together, such as sports equipment, holiday decorations, etc.

Once you’ve finally put all the tubs in their proper resting spot and can stand back and admire your clean and organized garage in all its splendor… pull out your camera and capture the moment! Not because you need to share the satisfying transformation on social but because it will make it easier to remember what you stored where!

Take detailed shots of each shelving unit in order as you work your way around the garage, and save them to a folder titled “Storage” in your phone (do the same for the basement, closets, and attic too). This folder will become invaluable as you save yourself endless trips to the garage looking for things you shoved in the attic or vice versa while resting comfortably on your living room couch scrolling through your phone. Future-you will thank you!

One last tip that future you will thank for… protect all those beautiful new shelves with a parking bumper, so you don’t accidentally crash into all your hard work.

Our curated cleaning kit for homeowners

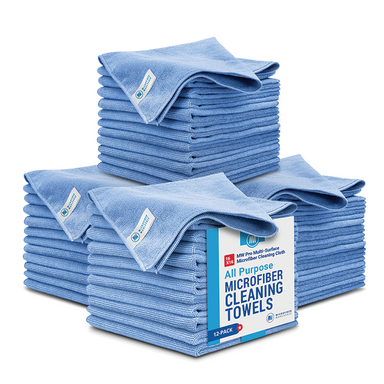
We’ve curated a cleaning kit of our favorite must-have products to keep a home in top shape. It contains two types of microfiber towels, a microfiber duster, and a heavy duty mop it. Check it out!

Preguntas frecuentes

Encuentre respuestas a nuestras preguntas más frecuentes.

Vídeos sobre cómo hacerlo

Vea cómo utilizar su microfibra de forma eficiente y eficaz.

Artículos

Artículos y consejos técnicos sobre el mejor uso y cuidado de su microfibra.

Entrevistas

Aprenda las mejores técnicas de limpieza de microfibras de la mano de profesionales expertos.

Continue To Cart Continue To Customize

By continuing with your order, you acknowledge and agree to the following:

Our property-marked towels are printed with a repeating pattern, and logo placement may vary from towel to towel.

You’ve chosen between receiving an emailed digital proof for a detailed review of your design at an additional cost of $20, or allowing our print team to use your uploaded file to prepare your order for printing.

We do not accept returns for printed property marked towels.